Pages

Showing posts with label Jackie's Jewels. Show all posts

February 20, 2016

Machine Works - CT PTU Letting off Steam by Jackie's Jewels


I amusing PSP X6 to create this tag

Using the newest kit by Jackie's Jewels named "Letting Off Steam". This kit is just beautiful! In regular color browns, tans, golds and a splash of blue!
Exquisite elements and papers!
Visit Jackie HERE 

I am using the lovely work of Misticheskaya available HERE

Mask is by ME and its #17

FTU Font Die Already

Here we go!


Open new image 700 x 700. My tube choice i resized by 45 c/p onto canvas. El 1 Frame c/p and place behind tube. El 12 and 13 resize by 30 c/p and place these elements on your frame towards left. Add drop shadows and enhance edges!. El 47 resize by 70 c/p and the top left, add drop shadow enhance edges.  El 37 resize by 80 c/p and place to far right behind Frame. Duplicate that layer, flip horizontal and place to the left side behind Frame. Now back to the original El 37 tube, now rotate right, c/p to the bottom underneath tube top the left, duplicate flip horizontal and place to the right. You want to  make it look like a ledge.  El 33 c/p and place to the bottom over Pipes. Elements 17 and 19 resize by 30 c/p El 17 and place to bottom far left, El 19 place by tube towards middle. El 31 resize by 30 c/p and place to the bottom right by tube. El 21 resize by 50 c/p and place by Hat. El 29 resize by 35 c/p and place to the bottom left by Lantern. El 52 resize by 25 c/p and place to far left by El 17, duplicate twice and spread those 2 layers. El 74 resize by 15 c/p and place to far left behind clock, duplicate three more times and spread at the bottom as you wish. El 76 and 79 resize by 15 c/p and place to the bottom in front of Book. El 11 c/p and place to far top right behind Frame. I used Paper 8 for the inside of Frame resize paper by 65. last El 34 resize by 45 c/p and place to the middle of Frame.
Merge your tag. Add your Maks I used paper 4 for mine. Merge again. Duplicate tag go to Properties: Overlay and lower opacity to about 48 on copy!
Add your name, CR and license
Save as PNG!
Thanks for looking!

January 17, 2016

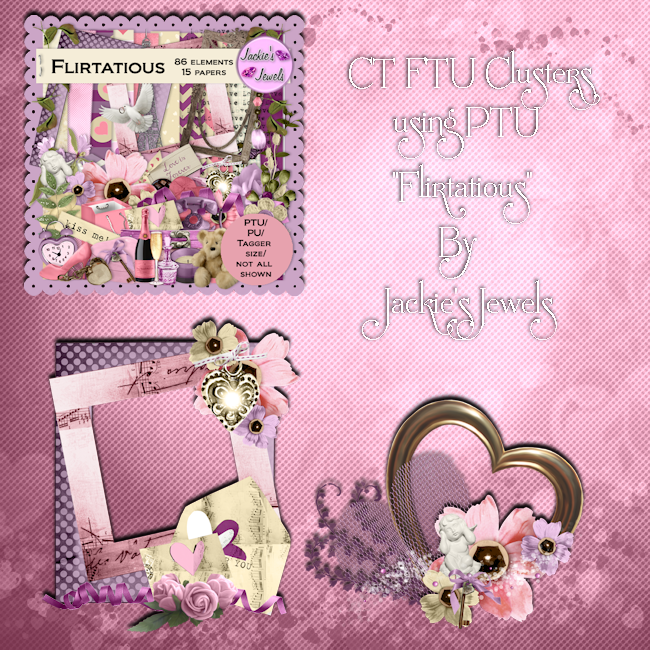
CT for Jackie's Jewels - FTU Clusters - PTU Kit Flirtatious


I played around  and made some FTU clusters with this playful beautiful kit by Jackie's Jewels named Flirtatious!


You can get the pretty kit HERE

Clusters


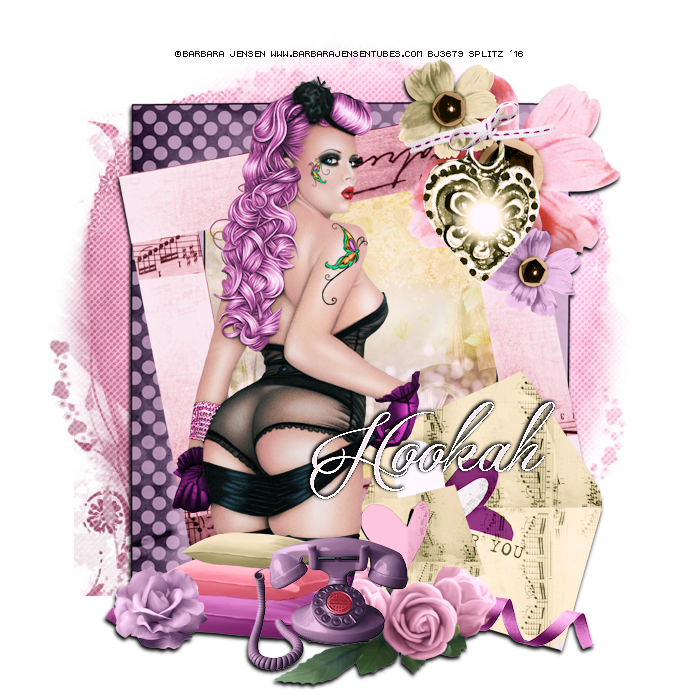
Here are 2 tags I made using the clusters and also using the fab work of Barbara Jensen and Alex Prihodko


Thanks for looking!


October 24, 2015

City of Light - CT PTU Tut - Bon Voyage by Jackie's Jewels


I am using PSP X6 to create this tag but any other version will work!

Using Jackie's Jewels newest beautiful kit "Bon Voyage" - HERE

Fabulous art by Nocturne - HERE

Mask 117 by Wee Scot Lass HERE

FTU Font Quickier

No outside filters used!

Here we go!


Open new image 700 x 700. I resized my tube choice by 40 c/p onto canvas. El Frame 1 resize by 80 c/p and place behind tube. El 11 Airplane resize by 30 c/p and place behind Frame towards top left. El 70 Tree resize by 60 c/p and place to far left inside frame, duplicate twice place one layer in the middle and the other to far left. El 37 Eiffel Tower resize by 60 c/p and place behind middle tree layer and Airplane, I added a bevel with filter color #fffefc then enhance edges. El 12 Building resize by  40 c/p and place towards right of Eiffel Tower, also added the bevel and enhance edges effects!. El 19 Bag resize by 60 c/p and place by tube's legs. El 14 Round Luggage resize by 60 c.p and place behind tube layer to bottom left. El 60 Orange Rose resize by 30 c/p and place to the left side in front of Round Luggage duplicate, flip horizontal and place to far right. . Go back to El 60 Rose resize smaller then  flip horizontal and place to the right front of Bag layer. El 64 Shoes resize by 40 c/p and place on top of Round Luggage. El 32 Perfume resize by 30 c/p and place by Shoes. El 13 Camera resize by 40 c/p and place by Bag. El 29 Mirror resize by 40 c/p and place by Luggage to the left. El 34 Jewelry Box resize by 30 c/p and place to bottom far right.  El 50 Save the Date card resize by 30 c/p and place in front of Bag layer. El 33 Key resize by 40 c/p and place tubes hand, add a bevel and enhance edges. I erased a little bit of the chain by tube's fingers. El 86 Book resize by 40 c/p and place to the bottom. El 62 Rose resize by 40c/p and place to bottom far right behind Luggage, duplicate and place in the middle of tube behind elements duplicate again flip horizontal and place to far bottom right. Last El 39 Gound c/p and place to the bottom underneath tube and elements. If you are happy with your creation, add your drop shadows. Merge Visible. Add your mask I am using 2 Papers, #11 and #12, c/p both papers, on Paper 11 Adjust Guassian Blur 3, Properties: Hardlight and lower opacity then merge down. After you make your mask then Duplicate and merge down again. On your Merged tag layer go to Photo Effects: Film and Filters and your filter color is #a0825c. Then on your Mask layer go to Photo Effects - Time machine - Cross Processing Intensity 35. Now Merge your tag, duplicate, on copy Guassian Blur 3, then properties overlay and lower opacity to about 55. Merge one more time,  add your name, cr and license and you are done!
Save as PNG!
Thanks for Looking!

September 27, 2015

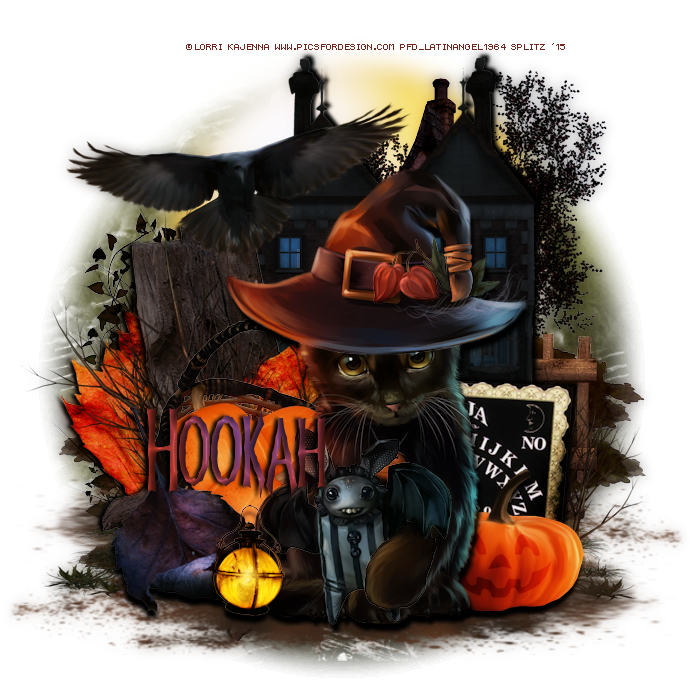
By the Moonlight - CT PTU Tut - A Chilling Night - Jackie's Jewels


I am using PSP X6 to create this tag but any other version will work!

Beautiful scrapkit by Jackie's Jewels named "A Chilling Night". Visit her HERE

Adorable tube by Kajenna HERE

Mask #60 is by Wee Scott Lass HERE

FTU Font Frankendork Tall

No outside filters used

Here we go!


Open new image 700x700 you can crop when done. I resize my tube choice by 25% c/p onto canvas. EL Ground c/p and place underneath tube. El Bird 3 c/p and place to top left of tube. El House 2 resize by 70 c/p and place to the left side of tube towards middle.  Back to El Ground, Duplicate layer, flip horizontal and place that layer underneath El House 1. Moon 2 resize by 70 c/p and place towards top right behind House 2. El Dead Bush 1 c/p and place to the left side of tube. El Ouija Board resize by 70 c/p and place to the right side of tube. El Basket of Pumpkins c/p and place to the left side of tube. El Dead bush 2 resize by 50 c/p and place to right side by Ouija. Leaf 1 c/p and place by Basket of Pumpkins. El Stump resize by 70 c/p and place to far left behind all elements. El Leaf 3 c/p and place to left behind Tree Stum, duplicate flip horizontal and place in front of Tree Stump for the right. Moon 2 resize by 150 c/p and place to the background behind House 2. El House 1, c/p and place directly behind House 2. El Lantern resize by 50 c/p an dplace left side of tube. El Pumpkin 2 resize by 50 c/p and place to the right side of tube. 
Add your drop shadows then merge visible. Duplicate tag, adjust gaussian blur 6.0 then go to properties overlay lower opacity to about 50. Merge visible again. Add our mask, I used paper 3, and colorized it, go to 
Adjust - Hue Saturation - Colorize: Hue: 44 Saturation 92
Merge Visible, add your name, cr and license info
Add your name, cr and license and save as PNG!


August 21, 2015

September - CT PTU Tut - Bonfire Nights by Jackie's Jewels


I am using PSP X6 to create this tag but any other version will work!

Stunning kit by Jackie's Jewels named "Bonfire Nights"

Gorgeous work by Di Halim

Mask is by Me #27

FTU Font Anha Queens VMF

No Outside Filters Used!

Here we go!

Open new image 700 x 700. Make your Mask, I used Paper 4 for mine, duplicate maks layer Merge Down. Resize tube to 35 c/p onto canvas
El 82 resize by 55 flip horizontal c/p and place underneath tube. 
El 41 House resize to 80 c/p place to the right for now, you will move it as you add on elements. El 35 resize by 80 place to the right on front of House layer 
El 86 Grass c/p and place to the bottom in front of Tree. El 8 Flowers resize by 40 c/p and place towards bottom in front of Grass layer. El 34 Log resize by 80 c/p and place to the bottom in front of Flowers. El 35 Leaf Scatter resize by 80 c/p and place just underneath Log, duplicate this layer and move towards left. El 15 Car resize by 35 c/p and place towards left side of House. You can move your house as you see fit. you want to make it look like its in distance. El 71 Lantern resize by 40 c/p and place by tube. El 9 Rose resize by 30 c/p and place behind Lantern to the left. Duplicate Rose twice and scatter as you wish at the bottom. El 19 Pumkin resize by 50 c/p and place towards the left behind Log. El 40 Camera resize by 30 c/p and place by right Lantern. El 56 Bunny resize by 40 c/p and place towards middle by Log. El 84 resize by 30 c/p and place by Lanter to the left. Go back to El 8 FLowers this time resize by 40 rotate right, c/p and place to the fat left. El 51 Ribbon resize by 80 flip horizontal c/p and place to fat right by Log. El 31 Walnuts resize by 30 c/p and place by Bunny duplicate layer and place in front of Lantern. El 16 resize by 50 c/p and place to far left behind 82. Add your drop shadows!
Duplicate tag go to properties Overlay and lower opacity.
Add your name, CR and License
Save as PNG!
Thanks for looking!

post signature

August 9, 2015

Each Moment - CT Wall Paper Tut, Freebie WA and Wall Paper Snag - Changing Sands by Jackie's Jewels


One of my absolute favorite kits by Jackie's Jewels named Changing Sands
Please visit her HERE

Beautiful tube by Zlata "Nancy" HERE

Word Art by me HERE

FTU Font Candlescript

Filters
Photo Effects
Xero Radiance


You can SNAG the Wall Paper
HERE
Password: THANKS

Here we go!

Do Not Forget Your Drop Shadows!

I have seen so many beautiful Wall Papers made I decided to try my hand at making them!

Open new image 1280 by 800. Take Paper 8 resize by 200 c/p onto canvas. Resize tube by 60 c/p and place to the right side of Background. El 32 Light House, c/p and place to the right by tube. El 76 Fence resize by 80 c/p  and place to the middle far right in front of light house and move lighthouse a little up towards right. El 70 Water c/p and place towards bottom of Lighthouse. EL 39 Bush resize by 70 c/p and place to towards middle of Fence. .. El 74 resize by 60 c/p and place behind gate towards right of tube. El 90 Cup with Shells resize by 40 c/p and place to wards bottom right  of tube. El 84 Leaves c/p and place towards bottom right behind tube. El 78 Blue Flower resize by 50 c/p and place by El 84 Leaves. Duplicate Flower and place behind Leaves a little up.  El 92 Starfish resize by 50 c/p and place by leaves. El 81 Gold Rose resize by 35 c/p and place towards middle of Gate behind leaves. Go back to El 81 Gold Rose resize smaller by 60 c/p and place in front f tube by the Cup. El 30 Blue Shell resize by 40 c/p and place behind Starfish. El 52 Curly Ribbon resize by 40 c/p and place behind Blue Shell. El 94 Watch resize by 50 free rotate 20.0 right c.p and place by Gold Rose to the right. El 57 PineCone and El  59 Anchor Button resize by 40 c/p and place towards bottom in front of tube. EL 46 resize by 60 c/p and place towards bottom left of tube, duplicate flip horizontal and place to the far bottom right. El 22 Shell resize by 40 c/p and place by Anchor Button. El 71 Netting c/p and place on top over Fence, Enhance Edges. Using El 74 again resize smaller and place two layers in front of Fence. I added the Bird and the Leaves Scatter  and I also added 2 layers of El 44 Sand towards bottom underneath Elements. Hide your Background Layer and Merge Visible.
I added Photo Effects - Time Machine - Cross Prcessing to the tag. Unhide your backgrouns got to Zero - Bad Dream 
115, 118 Colouration GREEN
You can always play around with the settings!
NOW Merge Visible. 
For the WA - Selections All Float,  Defloat
take Paper 16 resize to 50 c/p onto WA. Selections Invert Delete
Convert to Raster
Go to Effects: Inner Bevel 
Bevel #2 and Light Color #ffd3b9
Hit ok
Drop Shadow then Enhance Edges
For the Name i just added the same bevel and light color and added a drop shadow
You can always play around with the settings and light color!
Add your Name if you want, CR and License info!~
Save as PNG
post signature

June 21, 2015

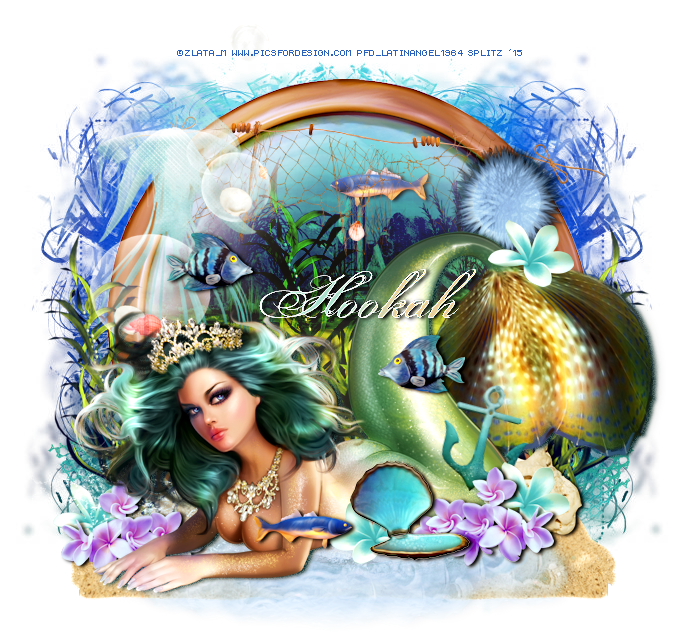
Underwater Realm - CT PTU Tut - Mermaid Treasures by Jackie's Jewels


I am using a beautiful scrap kit by Jackie's Jewels named Mermaid Treasures

A lovely tube by Zlata available HERE

Mask is by Millie #41 HERE

FTU Font Procelain

No Outside filters used

Don Not Forget Your Drop Shadows

Here We Go!


Open new image 700 x700. If you are going to animate, flood fill white.
C/P tube of choice. (If you are animating and if you are using the same  tube I am C/P the  the crown  c/p those layers separately from tube. 
El wave, c/p and place underneath left side of tube. El sand resize to 70 c/p and place underneath Wave. El Porthole resize to 90 c/p and place behind tube. Magic Wand, click on Porthole expand by 15. Paper 4 resize to 60 c/p and place behind port hole selections, invert delete, deselect. Duplicate paper layer go to Properties: Burn. El Petrified Wood resize to 60 c/p and place to the bottom right behind tube. El Seaweed 2 resize to 50 c/p and place inside frame towards middle. El Flowers resize to 50 c/p and place to the right by tube, duplicate this layer, flip horizontal and place towards far left behind tube. Go back to El Seaweed resize again by 80. C/p and place to far right by frame, duplicate this layer flip horizontal and place to the far left of frame. El Clam Shell resize to 20 c/p and place towards bottom by flowers. El Flower 3 resize to 20 flip horizontal c/p and place by Clamshell. I duplicated this Flower layer twice and scattered them around bottom. Take Elements Fish 4, Fish 2 and Sea Animal. I resized them to 30. you can get as creative as you want, I c/p the 3 elements and scattered them around my tag. El Jellyfish c/p and place towards left side in fron of Frame. El Netting resize to 30 c/p and place on top over Frame. El Anchor resixe to 30 c/p and place to the bottom right behind flowers. El Bubbles 2 resize to 70 c/p and place to the left side of Frame. 
If you are happy with your tag great! Duplicate your tube layer, adjust guassian blur 6.0 properties overlay opacity 55. If you are not going to animate merge visible, add your mask. merge visible again. Add your Name, CR and License info. 

To Animate
Click on you Crown and Necklace layer. Copy and paste onto Animation Shop
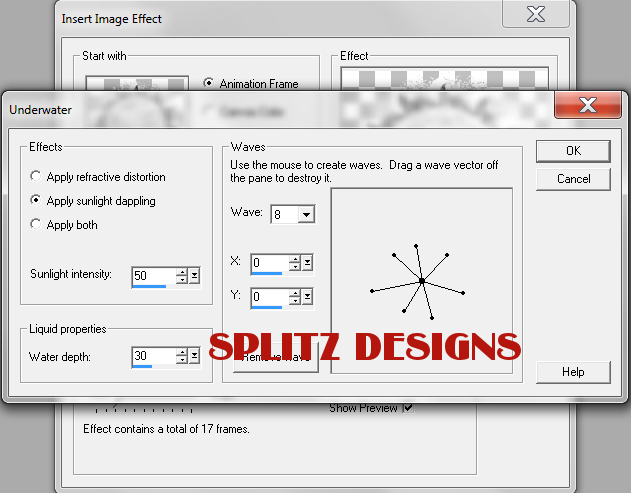
Go to Effects - Insert Image Effects


**Remember you can always play around with the settings :D**

Click ok once you have the settings you like. My animations has 18 Frames..Go to the first Frame of you animation - Delete. Now I have 17 frames.
Back to PSP close off Necklace and Crown layer. Copy merge rest of tag to Ani Shop. Duplicate your tag until have 17 frames. On you animations
Select All , Copy - go to your tag Select All - Paste onto current frame. 
Saves as Gif and you are done!

Thank you for looking!


post signature

June 6, 2015

Citrus Sunrise - CT PTU Tut - Citrus and Sage by Jackie's Jewels


Beautiful Scrap Kit by Jackie Jewels names Citrus and Sage 

The lovely art of Nocturne - HERE

Mask by Rachel - HERE

FTU font Respective 2.0

Filters
Xero - Bad Dream
Xero - Radiance
Photo Effects - Film and Filters

Don' Forget your Drop Shadows

Here We Go!
Open new image 700 x 700, c/p tube of choice onto canvas, add a drop shadow. duplicate tube layer, guassian blur 6.0 properties overlay lower opacity to 46
El 51 Grass, resize to 70 c/p and place underneath your tube. El 5 House Frame resize to 70 c/p and place towards middle behind other elements go to Effects - Xero Radiance. . El 46 tree resize to 90, c/p and place behind tube. Place tube that is looks like she is leaning  on it. Add drop shadow to tree layer. resize Tree El smaller, c/p flip horizontal and place towards right side of House Frame layer. Magic Wand click on house frame, expand by 6. c/p tube layer closeup, selections invert delete. duplicate tube layer, guassian blue 6.0 on copy, Effects - Xero Soft Vignette, properties overlay, Edge Effects Enhance on both sloseup tube layers. 
 El 72 Leave Folliage, resize to 70 place to far right behind tube, duplicate this layer and place to far right. El 33 Flower, c/p and place towards middle behind tube. El 38 resize to 30 c/p and place in front of Flower layer. El 39 Drink resize to 30 c/p and place to bottom far right by tube. El 64 Birdhouse resize to 70 c.p and place towards back behind Larger tree. El 26 Fruits resize to 40 c/p and place towards bottom left behind El 72 Folliage. El 32 resize to 30, duplicate layer twice and scatter them around the bottom. El 56 resize to 60, free roate 20.0 left c/p and place towards bottom left behind El 72 Folliage. El 47 resize to 50 c/p and place to right side by Birdhouse. Go back to El 33 Flower, duplicate this layer and place to bottom left behind house frame. Duplicate this layer again and place to far right top behind tree. EL 49 Flowers resize to 30 c/p and place to the bottom right on Grass. El 79 resize to 30 c/p and place by El 79 FLowersl El 68 SParkle layer c/p andplace over closeup tube layer. El 63 and 70 Birds resize to both 70 and place one bird by Birdhouse and one on Tree. El 45 Net c/p and place behind all elements. El 44 Butterfly resize to 20 c/p and place on Tube layer's leg, add drop shadow and Edfe Effects Enhance. 
Merge visible
Add your Mask, Duplicate Merge Down. Go to Effects - Xero Bad Dream. Click on Red with these settings
191 and 45
On my merged tag 
I also added Photo Effects - Film and Filters - Glamour
Filter color - #e5c9b8
Opacity 10
If you are happy with your tag great!
Merge all layers
Add your name, CR and License info
Thanks for looking!
post signature

May 31, 2015

MoonBeam - CT TUT Tut - Captivating Shadows by Jackie's Jewels


Using a beautifully made kit by Jackie's Jewels named Captivating Shadows!

Using the beautiful work of Barbara Jensen

FTU Font Porcelain

Filters DSB Flux Bright Noise

Mask is by Moonbeams and Spiderwebs number 34

HERE WE GO~!


Open new image 700 x 700, you can crop after your done!
C/P tube of choice onto your canvas
El 1 Window Frame, resize to 90, add some Bright Noise, c/p and place behind tube. Use Magic Wand click inside the frame expand by 5  
Take Paper 6 resize to 80, c/p and place inside Frame. Selections Invert Delete Deselect.
Working with the INSIDE of Frame. Take El 70 moon resize to about 70, c/p and place to tothe LEFT inside frame, erase anything showing outside the frame. El 21, 43 and 76. Resize these to your liking and place towards the bottom inside Frame. 
Add your drop shadows.
You can see my tag also for reference!
Working now decorating the back of the Frame, I used the following elements:
El 46, no resizing, Rotate right, flip horizontal c/p and place to the far left bottom behind frame, Duplicate, flip horizontal and place to the right side behind frame. Follow same steps as above with El 42. El 63 c/p and place towards top left behind frame, duplicate twice, and spread those 2 layers on top behind frame. El 11 c/p and place behind El 63 top right, duplicate this layer and place towards bottom left. The following elements I resized to about 40-30 and just scattered them around behind Frame!
El 10, 57, 58, 64, 68, 72, 77
Get as creative as you want, or you can see my tag for reference!
If your happy with how your Frame looks, lets move on to the bottom front of the Frame. 
El 64 resize to 50 flip horizontal and place to the bottom right behind tube. El 27 resize to 50 c/p and place in front of tube. El 28 resize to 50 c/p and next to El 57. El 36 resize to 40 c/p and place on top of El 27. El 54 resize to 40 c/p and place beside El 28. El 53 resize to 40 c/p and place behind El 54. El 48 resize to 70 c/p and place to the far left bottom. El 42 resize to 70 c/p and place to the bottom behind your Elements. I used El 63, 64, 69,  resize them to about 10 to 20 % and just scattered them at the bottom. Add your drop shadows!. Going back to Tube layer, duplicate, guassian blur on copy, properties BURN, lower opacity to 38

WORDART
Selections All, Float, Defloat c/p Paper 11, Invert Delete. Deselect.
Selections All, Float Defloat, New Layer expand by 3
Flood fill with a color from any of the elements,  I chose Blue.. Deselect, bring that layer towards bottom. On your top later add some Bright Noise. Merge, Duplicate, on copy Properties Screen.Resize to to about 70
Merge tag.
Add your name, copywrite and license info and save as PNG
Thanks for looking!


post signature

March 23, 2015

Beautiful Day - CT PTU Tut - Secret Garden by Jackie's Jewels


Gorgeous scrap kit by Jackie's Jewels with so many possibilities named Secret Garden. Visit her HERE

I am using the beautiful work of Anna Liwanag available for purchase at CDO

FTU Font Billion Stars

Mask by Rachel Set 35 Mask 4

Filters
DSB Flux Bright Noise

Don't Forget Your Drop Shadows

HERE WE GO!


Open new image 700 x 700 c/p tube of choice onto canvas. Take El 44, c/p and place behind tube, add some Radiance settings at 255 straight down . . El 57 resize to 85 c/p and place behind El 44. El 54 resize to 60, copy and place to the top left of El 44, duplicate this layer, flip horizontal and place to the top right of El 44 Add Edge Effects-Enhance Edges. . El 26 c/p and place to the far left behind El 57, duplicate this later and flip horizontal and place to the right. El 65 Free Rotate Right 40, c/p and place place to far left towards inside of El 44.  El 29 resize to 50 c/p and place towards inside left behind El 57. El 83 resize to 90 c/p and place behind El 29. El 98  and place towards back behind El 83.  El's 50, 58 and 92 resize all to 30 c/p and place them towards bottom front right. El 16 resize to 30 c/p and place towards bottom far left. El 15 resize to 15, scatter some layers to the bottom. El 59 resize to 50 c/p and place towards inside left of El 44. El 96 resize to 20 c/p andplace to the left by El 96, duplicate this later and place to the right. El 9 resize to 20 c/p and place to the left duplicate this layer and place to the right a little above. Edge Effects - Enhance on both these layers. El 89 C/p and place down underneath tube. Add your sparkles for accent and merge your tag. Add your Mask I used Paper 2, I duplicated Mask then used Enhance Edges. 
Add your name Copy Write and License
Save as PNG!
Thanks for looking!
post signature

March 7, 2015

Love Always Hopes - PTU Tut - L'Amour De Ma Vie - Jackie's Jewels


I am using PSP X6 to create this tag but any other version will work

Scrapkit is a gorgeous new one by Jackie's Jewels named L'Amour De Ma Vie
Visit her HERE


Beautiful Art by Verymany HERE

Mask is by Trese #0113 HERE

FTU Font Brickham Script

Filters
Photo Effects - Film and Filters

Don't Forget your Drop Shadows

HERE WE GO!

Open New Image 700 x 700, C/P tube of choice onto your canvas. Duplicate tube, on copy guassian blur 3.0 properties softlight lower opacity as desired. 
El 18 and 41 c/p and place underneath your tube, add your drop shadows.
EL 8 Leaves resize to 90, c.p and place behind your tube slightly to the left. Go back to this layer Flip Vertical Free Rotate 50 RIGHT, c/p and place above behind tube, merge down these two layers, Go to 
EFFECTS - PHOTO EFFECTS - Film and Filters
Vibriant Foliage -  Filter Color #e0c6aa - Density 10. El 1 Flower Wreath resize to 75 c/p and place towards back of frame peeking threw the leaves, add same Photo effects as above. Magic Wand click inside Wreath, take Paper 12 resize to 60 c/p and place inside frame, selections invert delete. Add Photo Effects as above.
 El 20 Paper Butterfly resize to 60 Enhance Edges, c/p and place to the right hand side of frame El. Do the same with Elements 64 Lights, c/p and place over El 20. El 30 Flower resize to 60 c/p and place to the right side behind tube, Add Photo Effects as above. Go back to El 60 Free Rotate 15 right, c/p and place to the far left behind frame. El 7 Tulip Resize to 25 c/p and place over El Lights ad drop shadow. El 9 Rose resize to 20 cp and place slight underneath El paper Butterfly, add drop shadow. I duplicate this layer twice and scattered it around Frame. Finishing touches for  behind the frame, to cover those empty spaces. Frame. Take El 41 Doily resize larger to 130 Enhance Edges, c/p and place behind frame.  El 49 Scatter resize to 80 c/p and place to the left behind  Frame, duplicate this layer and place to the right. El 36 Leave pattern resize to 80 c/p and place to the right, duplicate flip vertical merge down. Duplicate this layer and flip horizontal and place to the left.  El 10, 47 and 60 resize accordingly and place to the bottom by tube.
If you are happy with your tag great. Merge, duplicate tag on copy properties softlight opacity 57.
Add your Name, Copy write and License
Save as PNG
thanks for looking!
post signature

February 15, 2015

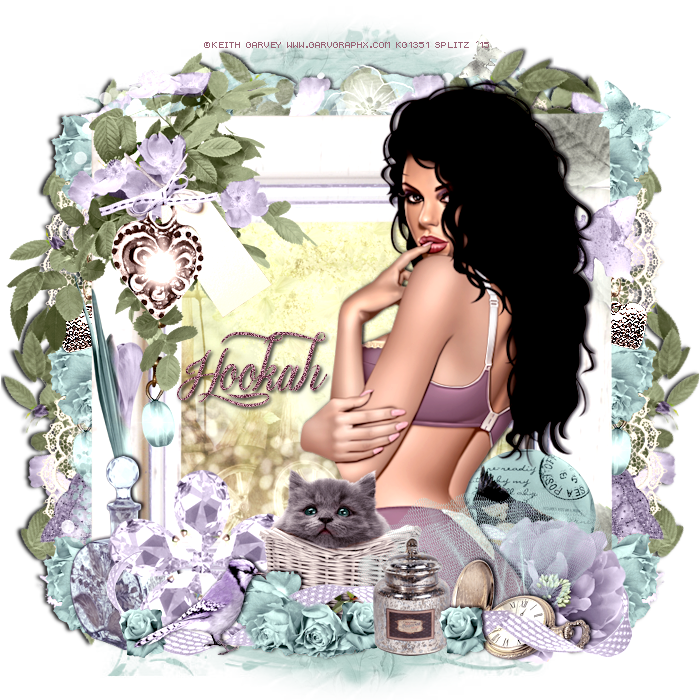
Hint of Spring - CT PTU Tut - Cindi's Lilac Dream by Jackie's Jewels

I used PSP X6 to create this tag but any other version will work!

I got to lay with a stunningly beautiful kit "Cindi's Lilac Dream" by Jackie's Jewels!
Go HERE

Beautiful Art by Keith Garvey

Filters
Xero Radiance
Photo Effects

Mask is by me but any other will work!

Right Click and Save as JPEG

Font is one of my favs
FTU Sverige

Here We Go!
Open New Image 700 x700. C/P tube of choice onto center of  canvas.  El 1 Frame resize to 95 C/P and place behind tube, add a touch of Radiance. On Frame, Magic Wand, Selections and Expand by 5, take Paper 3, resize to 70 then Flip Horizontal c/p and place behind frame, Selections-Invert-Delete. Still working with frame, El 28 C/P and place to the top left of frame. Same El 28 C/P and place behind top left of Frame. Duplicte this layer, flip horizontal and move lower. El 30 resize to 60, place to the top left, duplicate this layer two times and place them as you wish or like i did (see tag for reference) El 39 Lace resize to 60, c/p and place behind elements, duplicate and move that layer to the bottom
Elements 48 and 7 resize to 50 c/p intertwine them with the elements behind frame. Merge down all elements BEHIND frame. Duplicate, Flip Horizontal and place this layer to the right, add drop shadows.  For the Top behind frame I used El 28 and El 33, merge down these layers and add drop shadow. . El 50 resize to 50 c/p and place to the far right behind tube, El 82 c/p and place in front of El 50. El 66 Mesh, resize to 50 c/p and place to the bottom right  in front of tube. El 62 Stop Watch resize to 40 c/p and place by El 66 Mesh.  El 83 Flower resize to 20 c/p and place by El 62, duplicate this layer twice and scatter them at the bottom 
El 79 Ribbon resize to 80 c/p and place to the bottom. El 58 resize to 50 c/p and place to the bottom. El 6, 30, 67 and 84 resize to 50 and place to the bottom. El 22 resize to 80 c/p and place to the left side of frame. El 15 Butterfly Scatter c/p and place to the right side of Frame El 47 Bird resize to 40 c/p and place to the bottom.  For the top left of Frame I added EL 44 and 47 resized to 40 and El 56 resized to 60. Add drop shadow on tube. If you are happy with your tag Merge Visible. 
Go to Photo Effects
Film & Filters
VIVID
Custom
Filter Color: #c2b9cb
Densityh 20 or whatrever you are happy with!
Add your License, Name and Copywrite!
Save as PNG
Thanks for looking!
post signature

January 31, 2015

My Love - CT PTu Tut and Cluster Freebie - An Evening of Romance by Jackie's Jewels


Scrapkit is a lovely and romantic one by Jackie's Jewels named "An Evening of Romance -  HERE

Cluster is made with elements of this beautiful kit. You can download HERE


I am using the beautiful work of Alex Prihodko - HERE


Mask is by Rocked by Rachel - Set 36 - HERE

Filters used Xero - Radiance

FTU Font - Always Beside You

Don't Forget your Drop Shadows!

Here We Go!


Open new image 700 x 700. C/P tube of choice onto the center of your canvas.
Open up Cluster Frame included, C/P and place behind your tube. Magic Wand click inside frame. Selections - Expand by 5. C/P Paper 10 , selections invert delete. KEEP SELECTED. C/P closeup tube of choice HIT DELETE Deselect
On closeup tube Duplicate. On Copy Guassian Blur 6.0 Properties Screen. On Original Properties Luminance lower Opacity to 42. Take WA Mask resize to 70 C/P and place behind closeup tube layers. El Cherub and Gift Box 1 resize both to 50 C/P and place to the bottom left. El Rose bunch resize to 50 C/P and place to the bottom left, duplicate flip horizontal and place to the right. . El Mesh Heart resize to 50 C/P and place to the bottom behind Rose Bunch. El Rose Button resize to 30 C/P and place behind Rose Bunch. . El Flower 1 and 2 resize to 20 C/P and place to the bottom right. El Heart Trail resize to 60 C/P and place to bottom right. El Whispy Heart resize to 80 C/P and place to the bottom in front of elements and tube. If you are happy with your tag great. Merge Visible.
Add your mask of choice. I added a touch of Xero Radiance to my finished tag.
Add your name, license and copy write info
Save as PNG!
Thanks for looking!
post signature

January 17, 2015

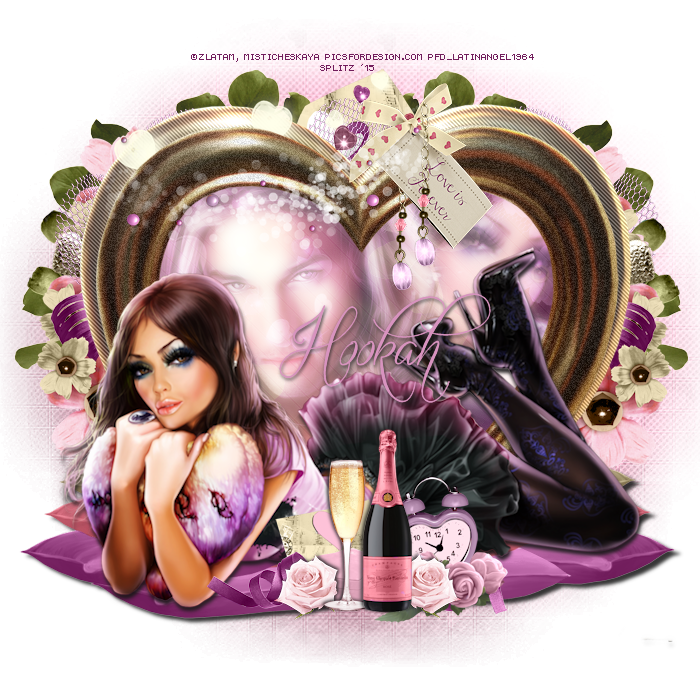
Love Is - CT PTU Tut - Flirtacious by Jackie's Jewels


Just in time for Valentine's Day! A pretty and playful NEW Scrap Kit  by Jackie's Jewels named Flirtacious!
Visit her HERE
Wonderful work of Zlata and Misticheskaya. You need a license to use their art and you can get both HERE
Texture is by Vix HERE
Filters
DSB Flux - Bright Noise
Penta - Jeans
Font
Quickier Demo
Mask is by WSL # 62 HERE
Don't Forget your Drop Shadows!
HERE WE GO!
Open image 700 x 700, c/p tube of choice onto your canvas
El  Heart Frame c/p behind tube . Go to Effects -Penta - Jeans
Settings 62 and 4 click ok. Now resize Frame  
to 90 c/p and place behind tube. Go to Effects-DSB Flux Bright Noise - Darker 17
Magic Wand, click inside smaller frame, expand by 6 c/p your texture of choice. I used one by Vix and changed the color. You can do this by going to Adjust-Hue/Saturation 
Hue: 214 Saturation: 114
c/p  and place inside frame Selections-Invert-Delete...KEEP SELECTED...now c/p tube of choice place inside frame, HIT DELETE.-deselect if you are not using another tube. 
Still working with inside your frame, Duplicate tube, on Copy Gaussian Blur 6.0 Properties - Screen, On Original Properties - Luminance.
El 35 Pillows. Resize to 60. c/p and place underneath tube. Duplicate this layer 3 times and spread layers at the bottom(see tag for reference) and add your drop shadow
El 9 Envelope resize to 30 c/p and place in front of tube to the center. El 17 Pink Roses resize to 30 c/p and place to the right bottom . El 54 Glass c/p and place to the center  El 53 Bottle resize to 50 c/p and place next to El 54 Glass. El 23 Pink Rose resize to 20 c/p and place next to bottle, duplicate flip horizontal and place to the other side.  .  El 46 "Love Is" bow resize to 50 c/p to the top right of Frame.  El 45 Clock resize to 30 c/p and place to the bottom behind Rose
For behind the Frame i used the following Elements
13, 16, 28, 71, and 72 
but there are so many beautiful elements in this kit you can use whichever ones. Resize you elements accordingly. I worked on the left side of the frame first. Then I merged downed these elements, duplicate, flip horizontal and placed to the right!
I added the Scatters for Accent.
On your main tube layer Duplicate. On your copy Gaussian Blur, Properties Soft Light Opacity 61
If you are happy with your tag great!
Merge Visible!
Add your name, copywrite and license info
Save as PNG!
Thanks for looking!
post signature

November 22, 2014

Winter is Calling - CT PTU Tut - A Countryside Winter by Jackie's Jewels


I used PSP X6 but any other version will work.

Beautiful kit by Jackie's Jewels named A Countryside Winter. Visit her HERE

Beautiful tube by Vika. You need a license to use her art and you can get both HERE

Gorgeous Mask by Rachel HERE

FTU Font Candelscript

Filters
Photo Effects
DSB Flux Bright Noise for Name

Animation is by Lovey HERE

Dont forget your drop shadows!

Here we go!


Open new Image 700 x 700, If you are going to animate Flood Fill WHITE.  c/p tube of choice onto the center of your canvas. El 5 Frame resize larger to 110 C/P and place to the back of your tube. We will be working with the inside of your frame. Magic Wand click inside frame Selections expand by 10. Take Paper 12 resize to 70 c/p behind your frame selections invert delete. El 38 Church, resize to 80 c/p and place towards the top middle. El 37 Mailbox
resize to 70 Flip Horizontal c/p and place towards the left side middle of frame. EL 40 Trees, resize to 70 flip horizontal c/p and place towards the bottom. El 34 Birds sharpen  resize to 30 c/p and plae to the bottom by tree. El 32 Sleigh resize to 30 c/p and place behind Birds. El 15 Reindeer resize to 20 flip horizontal c/p and place to the left behind mailbox.  El 35 resize to 80 C/P and place behind the frame to the left, duplicate this layer and place to the right. El 63 Present resize to 50 c/p and place to the far right behind tube, I resized El 63 again by 50 c/p and place by the Sleigh. El 47 pouch resize to 30 c/p and place to the bottom by tube. El 51 Blanket resize to 80 c/p and place underneath tube. El 67 resize to 50 c/p and place right underneath tube
El 52 Pinecones resize to 40 c/p and place to the bottom, duplicate this layer twice and scatter them at the bottom. El 64 resize to 40 c/p and place to the bottom by tube. El 57 and 58 cookies, resize to 40 c/p and place them to the top left of Frame El 92 Lantern resize to 40 also place to the top left. El 68 Leaves  resize to 60 c/p and place also to top left over the cookies and lantern. El 73 Red Branch resize to 40 c/p and place also to top left behind Leaves. El 89 rose resize to 30 c/p and place to the bottom as you wish, I duplicated this layer twice and scattered them at the bottom. If you are happy with your tag great. I added the Snowflake scatter Element and sort of framed the Frame with it. Merge Visible. Add your mask of choice Add your name, Copy Write and license.
TO ANIMATE
Close off all layers that are BEFORE the frame. Copy Merged, Paste  as New Animation in Animation Shop. Open Animation. You will see it has 41 Frames. Delete Copy Write Layer of Animation now you have 40 frames. With your tag you will duplicate until you have the 40 frames.
Go to Animation Select All Copy
Go to your Tag, Select All, Copy onto Selected Frame
Go back to PSP...Close off layers AFTER Frame. Uncheck the layers you had closed of previously. Copy Merge to Animation Shop,  Paste as New Animation. Make 40 Frames, Select All - Copy and Paste onto Selected Frames on your Animated tag. Save as Gif and you are Done!
post signature

November 9, 2014

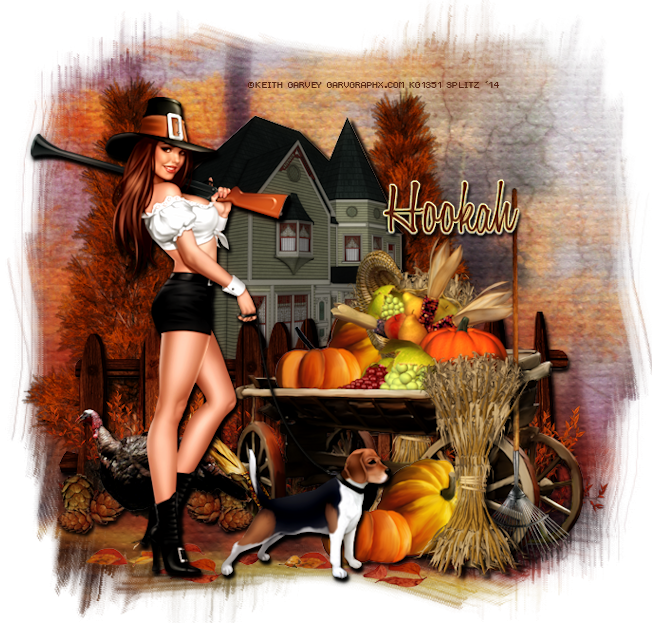
Thanksgiving Bounty - CT PTU Tut A Family Thanksgiving by Jackie's Jewels


I Used PSP X6 to create my tag but any other version will work!

Beautiful Scrapkit is "A Family Thanksgiving" by Jackie's Jewels - Visit her HERE

Beautiful tube by Keith Garvey. You need a license to use his work and you can get both HERE

Mask is by Wee Scott Lass HERE

FTU Font Honey Script

Filters
Photo Effects - Film and Filters
XERO Bad Dream

Dont Forget your Drop Shadows!

HERE WE GO!


Open New Image 700 x 700 C/P tube of choice onto your canvas.
Take Paper 2, make your mask. Duplicate three times Merge Down the mask layers.  Close off your Tube Layer for now. El Cart resize to 80 c/p and place to the right right behind tube. El Cornucopia resize to 70 c/p and place right at the edge of the cart, El Pumpkins resize to 50 c/p and place right next to Cornucopia Merge down these two layers. Take your eraser tool, Round 10, Erase as much as you can until u see the border of the Cart. It helps if you magnify your image, i do mine to 200 %. 
Open your tube layer up. Take again Pumpkins c/p and place to bottom behind your tube. El Turkey resize to 40 c/p and place to the bottom behine tube. 
El Fence resize to 80 c/p and place to the right Duplicate layer and place to the left. . El Tree resize to 80 c/p and place to the right behind fence. El House 2 resize to 40 c/p and place to the right behind Tree. Take El tree again and resize smaller c/p and place to the right behind House. El pinecones resize to 40 c/p and place to the bottom right of Fence. I duplicated this layer twice and scattered them around the Fence. El Cornstalk resize to 60 c/p and place towards the right back of the cart. resize this ame element smaller and place to the front right of cart. El Rake resize to 80 c/p and place to the right by Cornstalk. El Scattered leaves c/p and place at the bottom, duplicate this layer again and scatter them. El Bush resize to 50 c/p and place behind fence in the middle. I duplicated this layer three times and scattered them at the bottom in front of fence. if you are happy with your tag great!.  o back to tube layer Photo Effects - Film and Filters, you can play around with the settings till you get it where you like it. Merge Visible!
Duplicate tag, Adjust, Gaussian Blur 6.0 On Copy Tag Layer - Xero Bad Dream with these settings
 115, 58 NONE
Properties
Soft Light - Opacity 41
Add your Name, Copy Write and License
Save as PNG
Thanks for looking!
post signature

October 31, 2014

Seasons Change - CT PTU Tut - Changing Sands by Jackie's Jewels


I created this tag using PSP X 6 but any other version will work

I am using a gorgeous scrap kit by Jackie's Jewels named Changing Sands - Visit her HERE

Using the lovely work of Verymany and you need a license to use her art - HERE

PTU Font SNF Ambrosia

Filters
Tramages - Wee Scratches
Xero Radiance
DSB Flux - Bright Noise (Name)

Mask is by Dee HERE

Dont forget your Drop Shadows!

Open New Image 700 x 700
C/P tube of choice onto canvas to the bottom.  For the background I am using Mask 6 by Dee and Paper 9. Once you make the mask, DUPLICATE and Merge Down. Frame 1 resize to 80 c/p and place behind your tube. Magic Wand click inside frame Selections - Expand by 4 c.p Paper 16 Selections - Invert - Delete - Do Not DESELECT. C/P your closeup of your tube HIT DELETE - Deselect. on your clse up tube layer, duplicate, on your copy Properties - Screen. On your Original layer Properties - Luminance Effects - Tramages - Wee Scratches Amount 41. El 44 Sand c/p and place underneath your tube. EL 34 Pumpkins resize to 60 c/p and place to the bottom in front of your tube. El 62 walnuts resize to 80 c/p and place to the bottom in front of pumpkins. EL 21 Shell resize to 20 c/p and place to the bottom, duplicate this layer again and place accordingly  to the bottom. El 22 Blue Shell repeat above steps. EL 59 Pinecone resize to 20, c/p and place to the bottom, duplicate this layer twice and place where you would like. 
El 11 Rope resize to 80 c/p and sort of drape over your frame.  El 9 Ribbon resize to 90 c/p and place to the bottom of your frame. El 46 Leaves Flip Horizontal 
 erase the branch.  
 c/p and place to the bottom behind Ribbon. Going back to EL 46 Leaves Rotate Right and Flip Vertical c/p and place to the top corner left erase any excess branch at the bottom . El  84 leaves resize to 50 c/p and place to the top left also. El 94 watch resize to 50 free rotate left 15 c/p and place to the bottom left. El 93 resize to 50 c/p and place to the top left of Frame. El 71 Net c/p and place to the top over Rope EL. EL 64 Flower resize to 40 and scatter a few layers around the bottom. Last El 37 Leaves Scatter resize to 80 c/p and place over Frame.
Merge Visible. Add a touch of Radiance, but that is totally up to you.
Add your name, license and copy write. Crop and save as PNG
Thanks for looking!


post signature

October 11, 2014

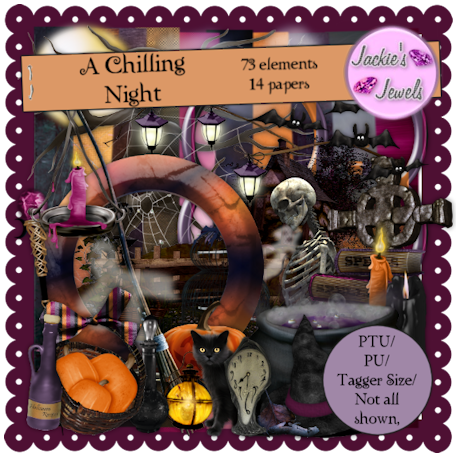
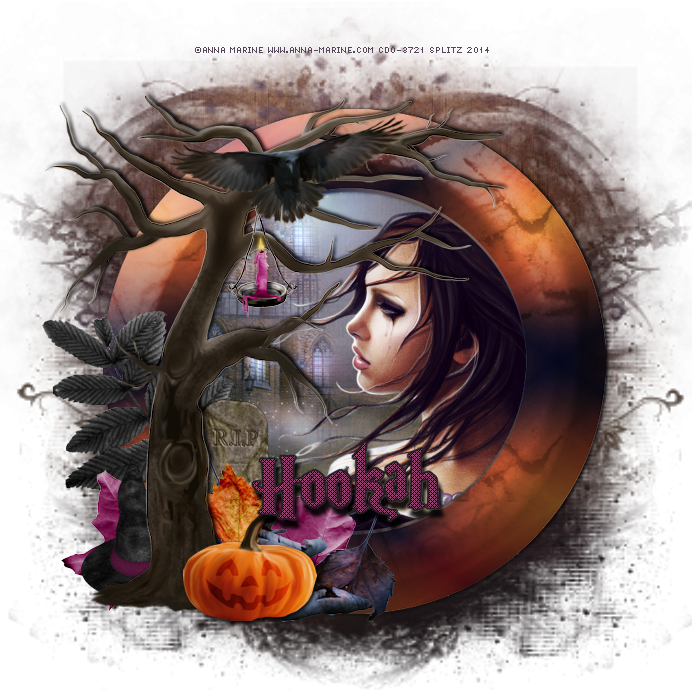
CT Tags and Cluster Freebie - A Chilling Night by Jackie's Jewels


A beautiful kit by Jackie's Jewels named " A Chilling Night"
Kit has 73 beautiful elements NONE are duplicated and 14 gorgeous papers!
Visit Jackie HERE


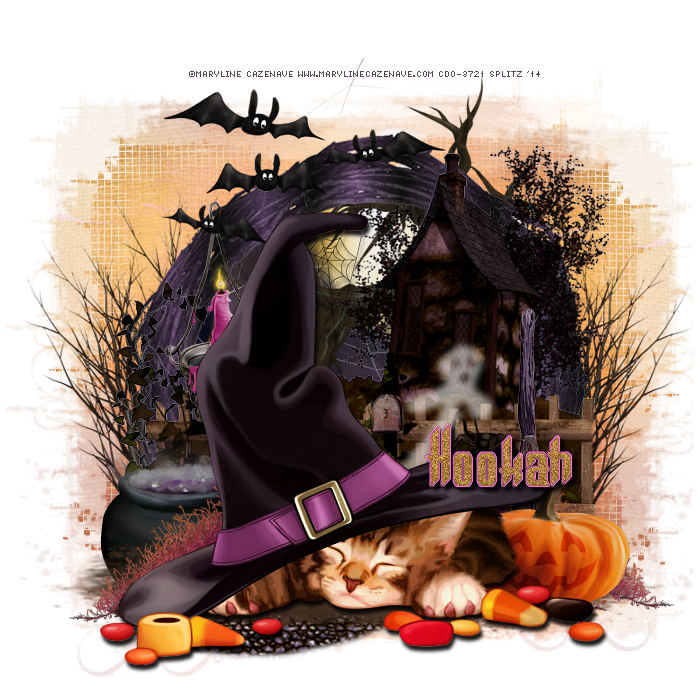
CT Tags using the the lovely work of Anna Marine and Maryline Cazenave both available for purchase at CDO and you need a license to use their work!


Cluster I made

DOWNLOAD HERE

Tag I made using Cluster


Thanks for looking!!


post signature

September 20, 2014

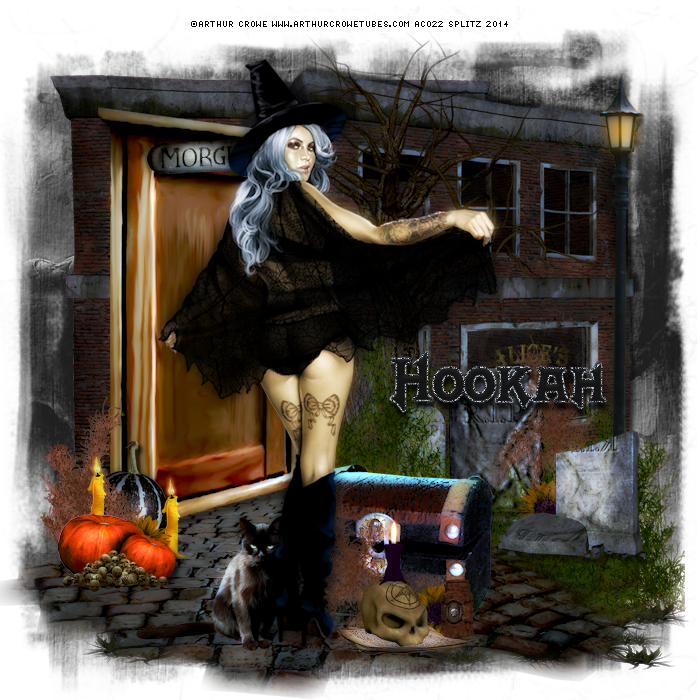
Midnight Hour - CT PTU Tut - Spellbound by Jackie's Jewels


I used PSP X6 to create my tag but any other version will do!

Scrapkit is by Jackie's Jewels named "Spellbound"
The beautiful kit is filled with 115 elements and 15 hauntingly beautiful papers!
Visit her HERE

Tube is by the fabulous Arthur Crowe. You need a license to use his art and you can get both HERE

Mask is by Wee Scott Lass
Mask # 3 - HERE

FTU Font Mephisto

Filters
Xero Porcelain and Radiance

HERE WE GO!


Remember your Drop Shadows!

Open New Image 700 x 700

C/P your tube of choice onto canvas

EL 19 resize to 80, C/P to the bottom
EL 13 resize to 70, C/P up to the left
EL 31, resize to 30, C/P and place on the door
EL 82 resize to 70, C/P to the bottom right behind EL 19
Duplicate this layer twice, and scatter the layers as shown on the tag
EL 116, C/P behind EL 82
EL 92, resize to 70, C/P behind EL 82
EL 94, resize to 80, C/P be the Door to the right
El 98 , 99 and 101, resize as small as you like, C/P and scatter them around the grass
EL 81 resize to 50 C/P and place to the bottom left by Door
Duplicate this layer and drape it over one of the Tombstones
EL 70 and 110 resize to 30 C/P and place to bottom left 
EL 66 resize to 30, C/P and place by pumpkins
Duplicate this layer and place to the other side of pumpkins
EL 106  resize to 50, C/P and place to the bottom by your tube
EL 43 resize to 80, C/P and place on top of  EL 106
EL 78 resize to 80 C/P and place by the Door 
EL 49, C/P and place towards back to the right
El 8 resize to 50 C/P and place down to the left o of your tube
EL 9 resize to 30, C/P and place to the bottom by tube

Close off your tube

Merge Visible 

Open tube layer
Duplicate - Adjust - Gaussian Blur 6
Properties Hardlight - Opacity 70

Go to your Merged Tag layer
Effects - Zero Porcelain
You can play around with the settings till you get it where you like
I also gave it a touch of Radiance

If your happy with your tag great!
Add your mask, I used Paper 3.
Merge Visible, Crop if needed, Add your name, license and copy write!

Save as PNG!
Thanks for looking!


post signature

September 13, 2014

For the love of Autumn - CT PTU TUT - A Day of Harvest - Jackie's Jewels


I used PSP X 4 to create this tag but any other version will work

I am using a beautiful scrap kit by Jackie's Jewels named A Day of Harvest
Visit her HERE

Alos using the gorgeous work of Vika Mistecheskaya. This is an EXCLUSIVE tube and it is available at PFD
Template is by ME!
Mask is a beautiful Fall one by Dee available HERE
Font is FTU Sevrige
HERE WE GO!
Open New Image 700 by 700
C/P your tube of choice onto the center of your canvas
Go to your Color Palette
I am using color #fddc83
Take your Preset Tool - Eclipse and draw out the shape
Convert to Raster and name it Yellow Oval
Draw another Eclipse this time a bit larger
using color #cb4517 and name is Orange Oval
Now on your color palette change the color back to #fddc83 
Go to Selections All - Float- De float -  NEW LAYER
Selections Border size 3
Effects - DSB Flux - Bright Noise - Darker 62
You have created your own little template :D
On the Orange Oval Layer 
Selections All - Float De Float
C/P  PAPER 1
Selections Invert Delete
Selection Non
On the Yellow Oval
Selections All - Float  - De Float
Take PAPER 5, resize to 60
C/P onto that layer
DO NO DESELECT
Still working with this layer
Take a closeup of your tube
C/P and place as you like
HIT DELETE
Duplicate your Tube Layer
On your copy 
Adjust - Blue - Gaussian Blur 6
Properties SCREEN
On your original TUBE layer
Properties Luminance
Lower Opacity to 69
You can start adding the elements!
Frame 5 - C/P behind your template to the left
DUPLICATE this layer 
Merge Down
Duplicate this layer again
Flip Horizontal and place to the right
MERGE DOWN
Duplicate again
On your copy go to 
Photo Effects - Black and White Filters
Click OK
Go to Properties Overlay
This will give leaves frame a darker color with shadows :D
Branch 1 Resize to 70
Rotate Left
C/P and place behind the frame 5
I duplicated this layer several times and place in different areas to behind Frame
Repeat the above steps for PineCone 1 Element
(see tag for reference)
Element Chicken Wire - Resize to 60
C/P and place behind your frame to the left
Duplicate this layer and place to the right
Element Hay - Resize to 50
C/P to the right behind your tube
Element Mushrooms 1 - Resize to 40
C/P and place to the left next to Pinecones
Element Pumpkins - Resize to 60
C/P and place to the bottom center
And of course I love Animals so I am putting in there the cute little squirrel :D
Element Mask...This is a gorgeous element and I am so using it...lol
Resize to about 70
C/P and place to the top left behind your frame and elements
Duplicate this layer
Merge Down
Duplicate again Flip hortizontal and place to the bottom Right right underneath the tube
Duplicate your MAIN tube Layer
Gaussian Blur 6
Properties Overlay
Opacity to 79
Merge Visible Crop if needed
Add Name and CR information
Your Done!!
Thank You for trying my tut!
post signature