Pages

Showing posts with label HEATHER'S DEVINE DEZIGNS. Show all posts

November 1, 2014

Angelic - CT PTU Tut - Heavenly Angel by Heather's Devine Dezigns


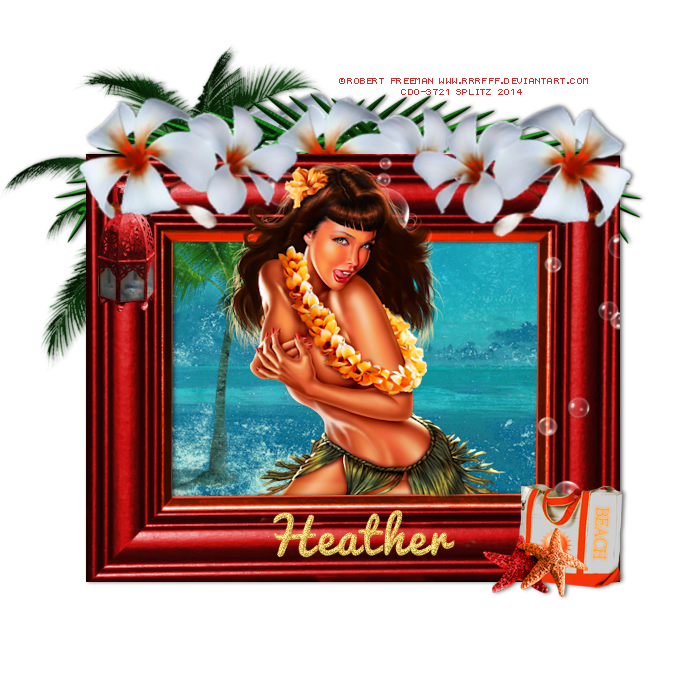
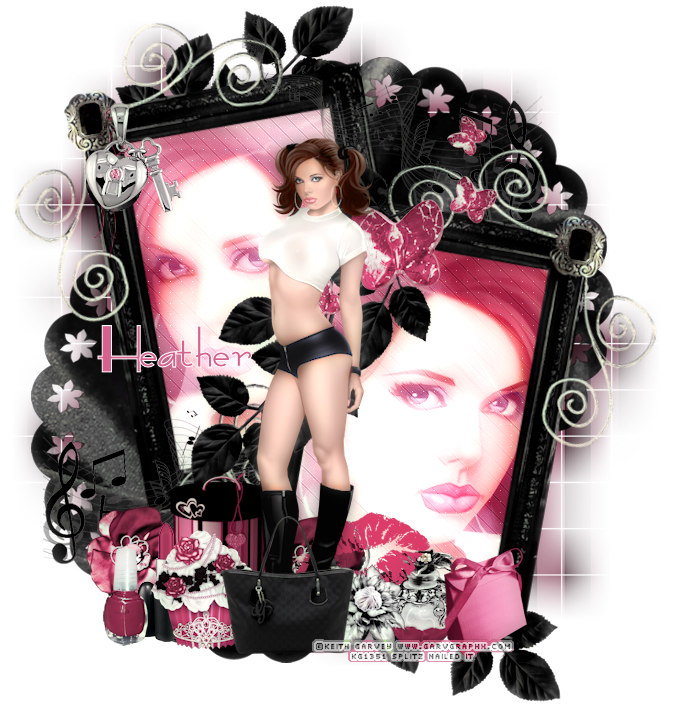
I created this tag using PSP X6 but any other version will work.

I am using a beautiful Scrap kit by Heather's Devine Dezigns "Heavenly Angel" - Visit Heather HERE

I am using the beautiful work of Barbara Jensen - You need a license to use her art and you can get both HERE

Mask is by Millie HERE

Filters
DSB Flux - Bright Noise - For Name
XERO Radiance

FTU Font Sofia

Dont forget your drop shadows

HERE WE GO!


Open new image 700 x 700. C/P tube of choice onto the center of your canvas.
EL 90 Frame, C/P and place behind your tube. 
Magic Wand, click inside frame, new layer and expand by 5. You can either use a texture or gradient. I chose a gradient using two colors from my tube, Flood Fill.
Do Not Deselect. Take your C/P and place inside frame, Delete do this two more times. Deselect - Merge Down those layers. Duplicate. On your copy Gaussian Blur 6.0, Properties Screen On your original Multiply. EL 65 smoky cluster resize to 80 C/P and place inside frame to the left.
El 71 wire branch resize to 70 c/p and place to the bottom left behind tube. El 41 resize to rotate right, free rotate left 15 sharpen c/p and place to the bottom, duplicate a few times and scatter them to the bottom by frame. El 42 Lantern resize to 50 c/p and place to the bottom left. El 22 Rose resize to 50 c/p and place behind the tube to the left. El 45 Ribbon resize to 70 c/p and place to the bottom in front of tube. El 26 Bell resize to 40 c/p and place to the far right. At this time take your eraser tool and erase and excess of your main tube layer at the bottom. Take El 22 Rose again, resize to 30 Flip Horizontal and place to the the bottom by lantern. Duplicate this layer flip horizontal and place to the far right behind El 26 Bell. El 47 Heart resize to 30 c/p and place to the bottom left. El 35 Star resize to 30 c/p and place to the bottom right. El 12 Harp resize to 60 c/p and place to the far right. El 1 Angel resize to 70 c/p and place to the far left. El 24 free rotate 40 c/p Sharpen, and place right behind your tube to the left, duplicate this layer and place to the right of your tube, a little lower erase and excess at the bottom. I added the glitter scatter to the bottom. 
For my main tube layer Duplicate - On Copy layer  Properties - Screen - Opacity 71
If you are happy with your tag great!
Merge Visible Add a little Radiance if you want
Add your mask , Copy write and license info. Save as PNG 
Thanks for looking!
post signature

October 12, 2014

Undead Beauty - CT PTU Tut - Night of the Dead by Heather's Devine Designs


I sed PSP X6 to creat my tag but any other version will work

Scrapkit is a great one from Heather's Devine Dezigns called Night of the Dead. Visit her HERE

Fantastic tube by Ismael Rac available HERE

Font is FTU Parseltongue

Mask is by Wee Scott Lass HERE


HERE WE GO!!

Open New Image 700 x 700 C/P  tube of choice onto the center of your canvas. WL 18 C/P and place behind your tube to the bottom Duplicate this layer Flip horizontal. El 26 resize to 40 C/P and place behind EL 18. El 24 and 28 resize to 40 C/P and place one on each side to the bottom. 
EL 48 C/P and place to the right behind EL 18. EL 68 C/P and place behind all your elements towards left
EL 82 Resize to 80 C/P and place behind all your elements. Magic Wand click inside frame selections - Modify - Expand by 15 take Paper 6 C/P and place in back of frame Selections Invert Delete Deselect, name this layer Background
Elements 35, 38 and 54 resize to 30 C/P and place them at the bottom as you wish. El 27 resize to 20 C/P and place to the left bottom. El 57 resize to 20 C/P and place at the bottom duplicate thisl ayer twice and scatter them as you like. El 34 C/P and place to the bottom. EL 56 and 53 resize to 20 C/P and place to the bottom right
EL 58 resize to 80 C/P and place at the bottom under all the elements
EL 52 resize to 40 C/P and place in the bottom middle.

Add your Mask, Name,. License and CR Info

For the Name I used Paper 2, Bevel and Drop Shadow!

Save as PNG

Thank you for looking!


post signature

September 28, 2014

Fright Night - CT Tag, Cluster freebie and Extras - Heather's Devine Dezigns


New fabby kit from Heather's Devine Dezigns - Fright Night - Visit her HERE!

Here is a cluster I made!

Right Click and SAVE!


Tag I made using Cluster and other elements from the kit!


Extras!


post signature

August 2, 2014

Sahara Dream - CT PTU Tutorial - Queen of the Nile by Heather's Devine Dezigns


Sahara Dream
You must have a basic knowledge of PSP
Program
PSP 4X but any other version will work!
Scrapkit
Beautiful new kit "Queen of the Nile" by Heather's Devine Dezigns available for purchase
HERE
Art
Beautiful new tube by Chris Pastel available for purchase
HERE
Filters
Radiance
Photo Effects
Eye Candy 4
Font
Passions Conflict
Here we go!
Open a 650 x 650 Image
c/p your tube of choice onto the center  your canvas
El 111 Frame, resize a little bigger and c/p behind your tube
take your magic wand, click inside frame
Selections-Expand-5
take paper 14
c/p behind your frame
Selections-Invert-Delete
Deselect
The kit is packed with some beautiful elements!
I used the following:
6
19
20
25
27
30
35
40
41
44
48
86
101
El 6
c/p underneath your tube
El 48
c/p to the right in from of your frame
Layers Palette-Right Click-Duplicate
place copy on left side of frame
EL 40 and 41 - resize to 40 
c/p one to the left and one to the right
EL 44 resize to 70
c/p to the left
EL 25 resize to 70
c/p behind your tube and vase to the left
EL 27 resize to 70
c/p to the right
EL 35 
c/p to the right behind Pilar
EL 19 resize to 80
c/p behind frame to the right
EL 20 resize to 30.
c/p to the far left bottom
Duplicate this layer, flip horizontal
and place to the far right bottom
EL 86 resize to 60
c/p to the right behind Pilar
Duplicate this layer, flip horizontal, and place to the right behind pilar
EL 101 resize to 70
c/p behind frame to the left
EL 30 resize to 40
c/p to the bottom right
Now go to your tube
add
Effects-Photo Effects-Films and Filters- Vivid Skin tones
I also did this to my frame!
If you are happy with your tag then you can merge visible
Add your copy write, license info
I blasted my tag with some Radiance at these settings
94-152-219-109
Once you are happy, add your name
Convert to raster
Selections All-Float-Defloat
Add New Raster Layer
Expand by 2
Flood Fill with your choice of color
I chose the one of the colors from my tube
Bring that layer to the bottom of your name
Still on that layer
Effects-Edge Effects-Enhance
Add a slight drop shadow
Merge Visible and you are done!
TO ANIMATE
take your magic wand
and select the top part of each pilar
go to 
Effects-Eye Candy 4 - Fire
you can play around with the settings to get it where u like it
Random Seed - Select None
copy to animation shop
Repeat these steps 2 more times, each time hitting Random Seed
and copy after current frame in Animation Shop
Frame Properties - 20
once you are happy with your animations 
Save as Gif!
Thank you for trying my tut!
post signature


July 9, 2014

Midnight Fairytale - CT PTU Tutorial - Heather's Devine Dezigns

Materials


Program
PSP X4 or any other version will work

A Fabulous PTU Scrap kit by Heather's Devine Dezigns 
HERE

The gorgeous art by Renee Biertempfel
You need a license to use her work and you can get that HERE

Mask
Your choice, I used a floral one by Dee
HERE

Font
FTU FairyDust 
HERE

Here We Go!
Open New Image 700 x 700
(You can resize later)

Take your tube, copy & and paste onto your canvas
 We will work with this in a bit.
Take Element 99 Frame, copy & paste and  place in the center of your canvas behind your tube. I added a little Radiance to the frame to make it darker, it is up to you :D
Take your magic wand click inside Frame
Selections-Modify-Expand by 5
Take Paper 4 
Copy and Paste onto your frame, position to your liking
Selections-Invert-Hit Delete
Take Element 5 Leaves
Copy & Paste, position at the bottom of frame
Take Element 74 copy and paste and place behind your frame
Take Element 17, Go to Image-Rotate Left-Free Rotate 25.0 and you will place them in the background to the left, Layers Palette, right click Duplicate and place on other side. NOW take same element and
 resize to 50
Copy & Paste to one side in front of your frame. On your Layers palette, right click Duplicate
Image-Flip Horizontal and place it on the other side of frame
Take Element 80 Mushrooms resize to 40 and place at the bottom of your frame position to your liking.
Take Element 40 resize to 80, Copy & Paste right in the bottom middle of the frame
Take Element 24, Resize to 40, Copy & Paste and place in front of the mushroom
Take Element 4 Resize to 30 
Copy & Paste and place right next to the books
Take Element 22 Wall and copy and past inside the frame and place it low to the left. Using your Eraser tool, erase any excess that is overlapping the frame.
 Take Element 12 House, Resize to 60 Copy & Paste and place right behind Wall.
Take Element 6 Resize to 30 and place on the right side bottom.
Lets go to your tube. We want to make it look like her knee is resting on the wall. So lets position your tube that way (See my tag for reference) then 
 we are going to Layers Palette, find your tube layer
Right click Duplicate. Move the tube copy behind frame.
If your happy with it you will take your eraser tool and go to your original tube layer and eras any excess tube that is showing outside the frame. Add a slight drop shadow.
Take Element 78, reside to 40 copy and paste at the bottom of the frame.
I wanted to add Element 24 the overflowing fountain also, I think it is so pretty!
Once you are happy with your beautiful creation you can Merge your tag!
Lets add our Mask
Layers, New Layer
Go to layer palette bring that new layer to the bottom. Take your Magic Wand, click on your background. I chose Paper 8 so lets copy & paste that.
Go Layers - New Mask - From Image and choose your mask choice. Layers-Merge Group.
I blasted my Merged tag with Porclain but as always you can play around with the filters and I also added a slight drop shadow!~

You are Done!

**Do not forget to add your Name, Copywrite, and License information**
Save your tag as PNG!

Thank you for trying my tut!. I would love to see anything you make!
post signature

July 2, 2014

CT Tags, Cluster Frame and Extras - Heather's Devine Designs

CT Tags and cluster frame using and fabby and fun kit "Tiki Beach Party " by Heather's Devine Designs!
Visit Heather here to scope out where she sells at and see her other goodies!  CT Tags done using the awesome work of Alex Prihodko and Robert Freeman

Cluster Frame
(just right click and save)


Tag made using cluster


EXTRAS!

June 15, 2014

CT Tags, Cluster Freebie and Extras - Aquatic Treasure by Heather's Devine Dezines

Got to play with a beautiful and fun new kit Heather's Devine Dezines "Aquatic Treasures". Visit Heather HERE to see all her goodies and the stores she sells at.

Tags made using the lovely work of Alex Prihodko and Elias


Cluster Preview


Cluster in PNG format - Right click and save


Tag I made using Cluster


Extras


post signature

April 3, 2014

CT Tags, Cluster Freebie and Extras - Spring Garden by Heather's Devine Dezign

Beautiful new kit by Heather's Debvine Dezigns! Loaded with 89 gorgeous realistic elements no duplicates and 20 lovely papers!  Visit heather at her blog HERE to see all her goodies and check other stores!

CT Tags made using the lovely art of Alex Prihodko and Verymany. You must have a license to use their work.


Cluster Preview


Cluster 
(Right Click and Save)


Tag I made using Cluster


Extras!!


post signature

November 3, 2013

CT Tags - Musical Elegance by Heather's Devine Dezigns

CT Tas made using a beautiful new kit by Heather's Devine Dezigns "Musical Elegance - Visit Heather HERE and show her some love!

CT Tags made using the gorgeous art of Garv and  Verymany


post signature