Pages

Showing posts with label Kissing Kate. Show all posts

January 24, 2015

Love Angel - CT PTU Tut - Kissing Kate


Lovely kit by Kissing Kate named Love Angel
HERE

Beautiful work of Verymany. You need a license to use her art and you can get that HERE

Mask by Rocked by Rachel
HERE

FTU Font 
One Starry Night

No Outside Filters used!

HERE WE GO!


Open image 700x700
C/P tube of choice onto your canvas
Add your mask to the background. I used Paper 7 for mine, duplicated this layer 3 times and merged down move a little to the left. . Duplicate this layer Flip Horizontal, move towards right. Merged down these two layers.  
EL 16 Heart Frame Free Rotate 15 Left. C/P and place behind tube Enhance Edges. 
EL 68 Pink Rose, C/P and place behind your tube towards the bottom left in front of heart Frame. . Duplicate this layer, flip horizontal and place towards top right. El 64 Leaf resize to 60 place underneath Bottom Rose to the left.
El 66 Leaves resize to 40 C/P and place to the bottom left in front of tube. El 60 Rose resize to 20 c/p and place in front of leaves.
El 19 Heart Bow resize to 40 c/p and place to the bottom in front of tube. 
El 44 Violin c/p and place to the left side behind tube. EL 50 Butterfly resize to 20 c/p and place to the bottom by bow Duplicate this layer twice and scatter to the top left and right. Enhance Edges on these three layers. EL 23 Heart Lock resize to 10 c/p and place to the bottom by butterfly. 
El 57 Birdcage resize to 20 c/p and place to the bottom left. I added the heart scatter  towards th ebackground. Go back to main tube, duplicate. On copy Gaussian Blur 3.0, Properties screen Merge your tag.

Duplicate Tag, On Copy Guassian Blur 3.0 Properties Hard Light lower Opacity to 46

Add Name, License and Copy write
Crop if Needed
Save s PNG

Thanks for looking!


post signature

December 7, 2014

Angel in the Snow - CT PTU Tut - Winter Meadow by Kissing Kate


I used PSP X6 to create this tag but any other version will work.

I am using a beautiful winter scrap kit by Kissing Kate called Winter Meadow HERE

Gorgeous art by Verymany. You need a license to use her art and you can get that HERE

Mask is by Dee HERE

FTU Font Rainy Wind

Filters
Xero Radiance

Don't Forget Your Drop Shadows

Here We Go!
Open New Image 700 x 700. C/P tube of choice onto your canvas.
El 10 Tree resize to 95 c/p and place to the left duplicate this layer and place to the right. El 62 Fir Tree resize to 95 c/p and place to the middle behind tube. El 54 Cluster resize to 95 c/p and place to the behind behind other elements. El 63 Snow c/p and place to the bottom behind tube. El 48 Pinecones resize to 30 c/p and place to the bottom left. I duplicated this layer three more times and scattered them at the bottom. El 36 Birdbath resize to 60 c/p and place behind tube to the left. El 47 leaves resize to 70 c/p and place in front of your tube to the bottom right (see tag for reference)
El 41 Bird resize to 30 c/p and place to the bottom left by El 47 Leaves. El 4 Wheel resize to 60 c/p and place behind El 36 Birdbath. El 51 Rose resize to 20 C/P and place to right bottom right by El 41 Bird.  I duplicated the Rose layer two more times and scattered them around to the bottom. El 25 House resize to 30 C/P and place to the bottom right. El 38 GiftBox resize to 20 c/p and place to the bottom in front of tube. El 59 Flower resize to 20 rotate left and place at them peaking behind Gift Box. I duplicated this layer twice and scattered them around as well. El 20 Deer resize to 60 c/p and place to left. Go back to tube layer, duplicate on copy gaussian blur proerties screen opacity 71. Merge visible, Add your Mask!
I added a little radiance to my merged tag. 
Add your name, copywrite and license info
Save as PNG
Thanks for looking!

December 1, 2014

Holly Jolly - CT PTU Tut "Let it Snow" by Kissing Kate


I used PSP X6 to create this tag but any opther version will work.

I am using a lovely kit by Kissing Kate named "Let It Snow"

Gorgeous tube by Verymany - You need a license to use her art and you can get both HERE

Mask is by Rachel HERE

FTU Font Santa's Big Secret

DSB Flux Bright noise - For Name\Photo Effects - Film and Filters

Here We Go!

Open new Image 700 x 700. C/P tube of choice onto your canvas. 
Frame 1 resize to 90 /P and place behind your tube. El 69 resize to 60 c/p and place to the bottom right  of frame, duplicate this layer flip horizontal and place to the bottom left. Going back to El 69, you are going to free rotate Left 20.0. c/p and place to the left duplicate this layer flip horizontal and place to the right. Go back to El 69, you are going to keep repeating the above steps until you have covered your entire Circle Frame. Merge down these layers. I used Photo Effects - Film and Filters
Vibrant Foliage, Filter Color #3e3d2a Density 55
Sharpen.
El 73 resize to 80 sharpen c/p and place to the right behind tube . The following elements go behind your tube resize them according
El 50, 55, 78, 80 
El 68 resize to 50 c/p and place to the bottom duplicate layer flip horizontal and place to the other side. The following El go in front of your tube
El 65, 66, 52, 72
El 71 resize to 40 c/p and place to the bottom left, duplicate this layer and place to the middle behind tube, duplicate again and place to far right. El 84 resize to 20 c/p and place to the top left on leaf frame, duplicate this layer twice and scatter them to the other side of the leaf frame.Back to Frame 1, Magic Wand Expand by 5 c/p Paper 4 Selections, Invert, Delete Deselect
Go to tube Layer
Duplicate, on Copy Gaussian Blur 6 Properties Hardlight Opacity 55
Merge Visible
Add your Mask
Add your Name License and Copy Write
For the name I used paper 4, Bevel and Bright Noise
Save as PNG
Thanks for Looking!

November 22, 2014

Blue Christmas - CT PTU Tut - Merry Blue by Kissing Kate


I used PSP X6 to create this tag but any other version will work

I am using a lovely kit by Kissing Kate called 'Merry Blue" Visit her HERE

Using the beautiful work of Vika Mistecheskaya. You need a license to use her work and you can get both HERE

FTU Font Santa's Big Secret

Mask is a lovely Winter Mask by Dee HERE

Filters
Xero Porcelain
DSB Flux - Bright Noise for name

Don't Forget your Drop Shadows

Here We Go

Open new image 700 x 700. C/P tube of choice onto the center of your canvas. Take FRAME 4 resize larger, I did mine to 110, c/p and place behind your tube. Magic Wand, click inside frame, expand selections by 10. Take Paper 7, resize to 60 c/p onto your frame selections invert delete. Move paper behind Frame. El 36 Tree resize to 50, Sharpen, c/p and place inside frame, duplicate thislayer twice and spread layers  in the frame. El 17 fern resize to 40 c/p to the bottom left behind tube, duplicate this layer flip horizontal and place to the right. Duplicate again and place in front of tube. El 56 tree resize to 40 and place to the left behind frame (see tag for reference) duplicate this layer and place to 
center right behind tube. El 3 rooftop resize to 30 c/p and place to the left behind El 56. El 65 resize to 40 and place to the middle of the frameOnce your happy with the inside of frame. We can start adding the elements at the bottom by tube. There are really beautiful elements in the kit. El 67 Snow resize to 50 c/p to the bottom right behind tube, duplicate this layer flip horizontal and place to the left. I also duplicated this layer several times to create a "ground" at the bottom of tube.
El 30 Presents resize to 30 c/p and place in front by tube. El 29 Rose resize to 20 Sharpen c/p by Presents, duplicate this layer flip horizontal and place to the middle by presents.
El 15 resize to 30 c/p and place to the left behind tube. El 11 resize to 20 c/p and place by El 15 behind tube. El Star resize to 20 c/p and place to the far left, I duplicated this layer a few times and scattered them at the bottom El 64 resize to 40 c/p and place to the left behind tube. Last I took Frame 1 resize to 95 c/p and place behind Frame to the left , duplicate this layer flip horizontal and place to the right behind frame.
Back to the tube layer, duplicate gaussian blur 6.0, properties soft light opacity 53.
Merge Visible, I gave my finished tag a little Xero - Porcelain.
Add your mask of choice
Add your name Copy Write, License info and your done!

Thanks for looking!

post signature

November 9, 2014

Celebrate Fall - CT PTU Tut - Autumn Blush by Kissing Kate


I used PSP X6 to create this tag but any other version will work

Scrapkit is a gorgeous one by Kissing Kate named Autumn Blush - HERE

Beautiful Art is by Alex Prihodko named Autumn Melody - HERE

Font is Passions Conflict

Filters 
Photo Effects - Comes with program
Xero Radiance

Mask is by Moonbeams and Spiderwebs HERE

Don't Forget your Drop Shadows!

HERE WE GO!
Open New Image 700 x 700. C/P tube of choice onto the center of your canvas.
Frame 4 resize to 85 c/p and place behind your tube. Magic Wand
 click inside your frame Expand by 10 C/P Paper 4 Selections Invert Delete Deselect. El 46 resize to 80 Free Rotate Left 15 and place to the left behind tube. El 34 resize to 50 c/p and place behind tube to the right. EL 2 c/p and place to the bottom behind top elements. El 10 resize to 40 c/p and place behind EL 2 to the left. El 7 resize to 30 c/p and place to the left by tube. El 13 resize to 30 c/p and place behind El 7 to the left. El 7 resize to 30 c/p and place to the far left in front of frame, duplicate this layer flip horizontal and place to the far right. El 54 resize to 10  c/p and place to the bottom, duplicate this layer a few times and scatter them as you like. El 63 repeat above steps. El 22 resize to 22 Rotate Right c/p and place to the left behind El 46. El 29 resize to 20 c/p and place to the right.
On my tube I went to 
Photo Effects - Film and Filters
Vivid
Custom
Filter Color - #f2dec8
Density 5
You can always play around with the setting to get it where you like it!
If you are happy with your tag Merge Visible. Add your mask,  I used paper 8.  Move your maks a little low to make a "ground" duplicate the mask to make it darker.
Merge Visible.
I added a touch of Xero Radiance, but that is up to you~
Add your Name Copy Write and License info
Save as PNG
Thank you for looking!
post signature

October 25, 2014

Golden Days - CT PTU Tut - Orange Autumn by Kissing Kate


I used PSP X6 to create this tag but any other version will work\

Beautiful Scrap Kit by Kissing Kate named "Orange Autumn". Visit her HERE

Beautiful Art by Zlata M - HERE

Mask by Dee - HERE

PTU Font - SNF Ambrosia

Filters
XERO - Radiance and Bad Dream\
For Name - I used DSB Flux - Bright Noise

Don't forget your drop shadows!

HERE WE GO!


Open New Image 700 x 700
C/P and place your tube of choice onto your canvas
Frame 2 resize to 85 C/P and place in front of  your tube. Magic Wand click inside frame
Select your tube layer on you layers palette, Selections Invert Delete
KEEP SELECTED
Take Paper 3 C/P and place behind your tube. Make sure your paper layer is selected on you layers palette Selections - DELETE - Deselect
EL 56 resize to 50 Free Rotate right 30, C/P and place to the bottom left behind frame. Duplicate this layer flip horizontal and place to the right bottom behind frame. Free Rotate El 56 again by 30 right C/P and place to the middle left behind frame, 
duplicate this layer  flip horizontal and place to the right behind frame
EL 18 and 14 resize to 60 C/P and place to the left side of the frame. EL 63 resize to 40 c/p and place in front of EL 18 and 14.  EL 31 resize to 30 c/p and place to the left.  El 37 resize to 50 c/p and place t the bottom left. El 19 resize to 30 c/p and place behind El 37 to the left. El 65 resize to 40 c/p and place towards bottom middle. El 2 resize to 30 c/p and place to the bottom left
EL 26 resize to 20 c/p and place behind EL 2. EL 27 resize to 20 c/p and place behind el 2. El 1 resize to 20 C/P and place to the bottom. 
El 43 resize to 40 c/P and place over bottom elements, Edge Effects - Enhance Edges
EL 17 C/P and place towards back of frame to the left duplicate this layer andplace to the right
Back to your maine tube layer duplicate - on Copy layer Gaussian Blue 6.0 - Xero Bad Dream you can play with your settings till you get it where u want - 
Properties - Screen - Opacity 60
I gave my finished tag a blast of Radiance!
Merge Visible. Add your mask of choice
Copy write and License info
Save as PNG
post signature

October 11, 2014

Purple Passion - CT PTU Tut - Mystere by Kissing Kate


I used PSP X6 to make this tag

Scrapkit is a beautiful one by Kissing Kate named "Mystere". You can visit here HERE

Tube is Sentimental by the fabulous Arthur Crowe. You need a license to use his work and you can get both HERE You will need a tube with a close up for this tut!

FTU Font Kleymissky

Mask is by Moonbeams and Spiderwebs HERE

DSB Flux - Bright Noise for name

HERE WE GO!
Open new image 700 x 700, C/P your tube of choice onto the center of your canvas.
Frame 3, Rotate right, C/P and place behind your tube
Magic Wand, click inside your frame, C/P Paper 2 Selections, Invert, Delete
DO NO DESELECT
Take your close up of your tube, C/P inside in your frame
Selections, Delete,  Deselect
Duplicate the tube layer
On your copy Adjust - Gaussian Blue 6.0 - Properties Screen
On your original tube layer Luminance lower Opacity to where you like, i did mine to 55.
For behind the the frame:
El 14 Flower C/P and place to the top right corner of frame duplicate this layer and place to the bottom left behind frame
EL 68 Fan resize to 80 C/P and place to the bottom right duplicate this layer and place to the top left
EL 32 resize to 80 , free rotate 15.0 left. C/P and place to the right bottom duplicate this layer and place to the left bottom
For the bottom of the frame:
EL 73 resize to 40 rotate left 15, c/p and place to the left duplicate this layer and place to the right
EL 73 resize to 70 C/P and place in front of your tube to bottom.
Elements 3, 8, 13, 19, 20, 30, 31, 35, 37,  62, 63, 77 - I resized to 20 or 30 and scattered them at the bottom.  See tag for reference!
El 7 Sparkles resize to 80 C/P and place over frame to the left.
Go back to your main tube, duplicate. on copy adjust gaussian blur 6 properties hardlight.
If your happy with your tag great! Merge Visible, Add your mask, name, license and copy write!
For the name, I converted it to raster. Selections float defloat add a new layer
floodfill. DSB Bright noise Darker on that layer,  went back to name and added a bevel and drop shadow!
Save as PNG and you are done!
Thanks for looking!
post signature

October 4, 2014

Framed - CT PTU Tut - 1920's Girl by Kissing Kate


I used PSP X5 to crete this tag but any other version will work

Scrapkit is a lovely one by Kissing Kate named "1920's Girl"
Visit Her HERE

I used the fantastic work of Barbara Jensen available HERE

FTU Font Before the Rain

Mask is is by Moonbeams and Spiderwebs HERE

Here we go!


Open New Image 700 by 700

C/P your closeup tube onto your canvas. Take Frame 1, resize to 90 C/P and place behind your tube
Take Magic Wand, click inside Frame - Selections, Expand by 6 now click on your tube layer, then Selections Invert
KEEP SELECTED
EL 69 Scatter, resize to 40 and place to the right behind your tube
Go back to your tube layer Duplicate, Gaussian Blur 6 Properties Screen lower opacity to your liking.
Take Paper 6 C/P and place behind Frame Hit Delete, Deselect
Elements 59 and 56 resize to 4 C/P to the bottom of the Frame. El 34 Blue Rose resize to 30  Rotate Right C/P and place to the right. Resize the rose smaller, rotate left, C/P and place between EL 59 and 56. EL 39 Peacock Feather resize to 50 Free Rotate Left 10 C/P and place to the right behind the other elements.
Element 63 Blue Leaves resize to 50, Free Rotate Left 10 C/P and place behind Peacock Feather Duplicate this layer, /P and place lower right. Same Element Rotate Left and place to the bottom
EL 61 Lace resize to 70 C/P and place to the bottom
EL 43 resize to 30 C.P and place to the bottom
EL 68 Blue Gem resize to 40 Rotate right 10 C/P and place to the bottom, Duplicate this layer twice and scatter them as you wish
EL 53 Mask resize to 30 C/P and place to the right in front of Peacock Feather
EL 29 resize to 40 C/P and place to the right side of the Frame behind Peacock Feather and blue leaves. Duplicate this layer, flip horizontal and place in the same same location up above.
 I added the following elements to the background 64 and 61
Merge Visible, Blast it with a little Radiance
Add your mask
Add your name, license and CR info!
Save as PNG

Thank you for looking!


post signature

September 20, 2014

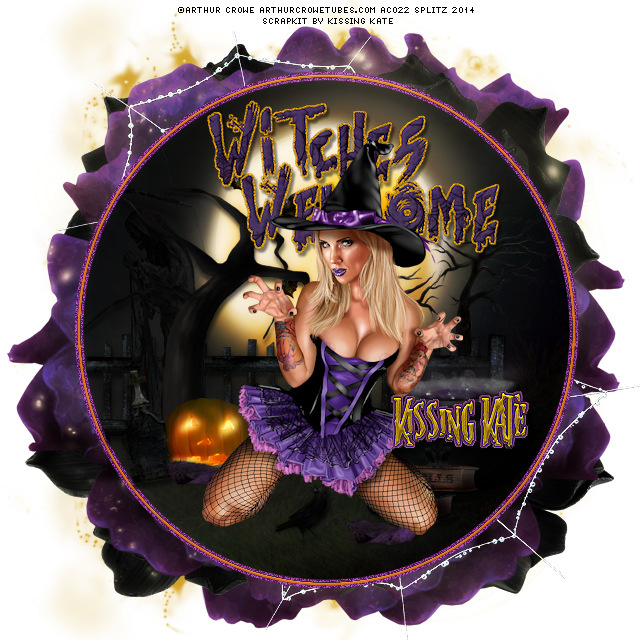
Witches Welcome! - CT PTU Tut and Freebie WA - Witch Doctor by Kissing Kate


I created this tag using PSP X 6

Scrap kit is by Kissing Kate named Witch Doctor.
Fabulous kit!
Available HERE

Tube Art is by Arthur Crowe
available HERE

Filters
DSB Flux
Xero Radiance

Mask is by Rocked By Rachel HERE

FTU Font Nightmare

WA is by me

Here We Go!

Open New Image 700 x 700
C/P your tube of choice onto your canvas
Take your Preset Tool - Eclipse
Background Black Foreground Null
Draw a circle, convert to raster
Rename Circle
Still on this layer
Selections All - Float - Defloat
New Layer
Selections  - Modify - Selection Borders - 3 Outside
Flood Fill with one of your Tube Colors
Rename Border 1
DO NOT DESELECT YET
New Layer
Selections - Modify - Selection Borders - 3 Outside
Flood Fill with a second color from your tube
Rename Border 2
Delect
On your Border 1 Layer
Go to Properties - Layers - Bevel 
Border 2
Effects - Dsb Flux Bright Noise - Lighter 46
Working with the  Circle Layer
Selections All - Float - Defloat - New Layer
Take Paper 4 resize to 80
C/P and place on your circle
Selections - Inverts Delete
Deselect
EL 48 Moon
C/P and place right above behind your tube
EL 10 Tree resize to 20
C/P and place towards the background as you wish
EL 63 Gate resize to 80
C/P  place in front of Moon towards Middle
Take your eraser tool and erase any excess
EL 47 Tree resize to 80
C/P and place to the left
EL 20 Cauldron resize to 30
C/P to the right
EL 22 Spell Books resize to 20
C/P and place in front of Cauldron
EL 21 Yellow Flower resize to 10
C/P and place next to books
EL 6 Grim Reaper resize to 50
EL 11 Pumpkin resize to 20 resize and place right in front of EL 47 Tree
C/P and place behind EL 47 Tree
EL 3 Bird resize to 10
C/P and place to the bottom
EL 23 Leaf resize to 20 scatter them as you wish to the bottom
Add your Drop Shadows to your Elements!
For behind the Circle Frame
I used EL 59  Purple Flower and EL 54 Black Flower
I also used EL 41 Web as an accent!
Close off your tube Layer...Merge Visible
Add Xero Radiance
Open your tube layer
Duplicate - Adjust - Gaussian Blur 6
Properties - Overlay - Opacity 57
For WA
Selections All - Float - DeFloat 
C/P paper of choice
Invert - Delete - Deselect
Properties - Layer Styles - Bevel
Selections All - Float - DeFloat - New Layer
Flood fill with color of choice
Move that layer to the bottom
Effects - DSB Flux - Bright Noise
Darker
Place whever you wish
Add your name, copy write and license info
Save as PNG!
post signature

August 30, 2014

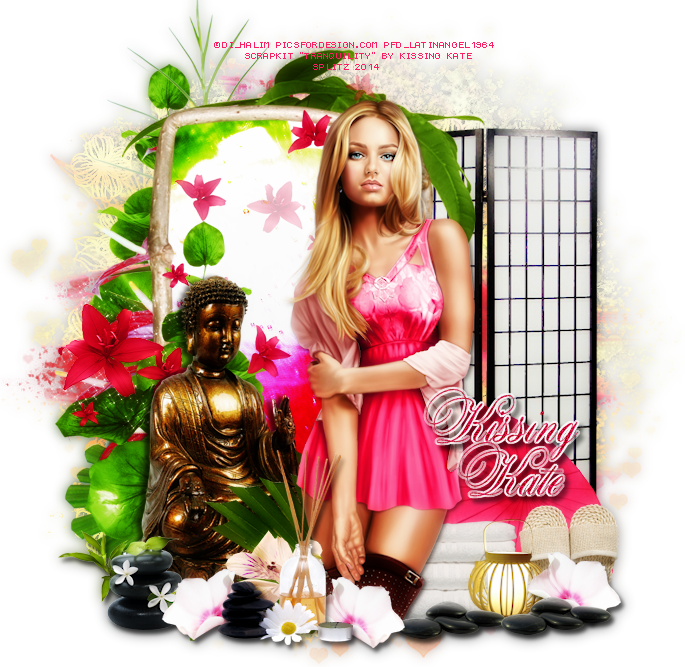
Calm Harmony - CT PTU Tut - Tranquility by Kissing Kate


I used PSP X4 to create this tag but any other version will work!

Scrapkit
A beautiful scrapkit by Kissing Kate named Tranquility - Visit her HERE

Tube of choice is the lovely work by Di_Halim available HERE

Mask of choice is by Dee available HERE

Filters
Xero-Radiance

Font is an FTU font Marate

Here We Go!

**Remember your Drop Shadows**

Open New Image 700 x 700

C/P your tube of choice onto the center of your canvas

EL 14 resize to 70 c/p behind your tube t0 the left with the green leaves showing

EL Frame 1 resize to 70, C/P behind your tube to the left. Take your magic wand, select frame
Selections-Modify-Expand by 6
take EL 70 C/P behind Frame
Selections-Invert-Delete
Deselect
Duplicate that layer
On your copy layer
Properties - Blend Mode- Hard light

EL 65 resize to 80 C/P and place to the right  behind frame

EL 81 C/P behind your frame to the left
EL 51 Gold Statue resize to 50, flip horizontal, C/P and place to the left side in front of Frame
EL 48 resize to 70, C/P and place right behind Statue
Duplicate this layer and place right up behind your frame

EL 77 towels resize to 50 C/P and place to the right behind your tube
EL80 sandals resize to 30 C/P and place to the right next to Towels

I used the following elements to adorn the bottom of the tag

EL 28 resize to 30 C/P to the bottom of your in front of your tube
EL 64 resize to 20 C/P to the right bottom
Duplicate this layer and place next to original layer
EL 60 resize to 30 C/P and place to the right
EL 68 resize to 20 C/P and place to the far bottom right
EL 64 resize to 20 you can scatter these as you like at the bottom

If your happy with your tag GREAT!
Add your mask, I used Paper 5 and I duplicated my mask also
...Merge Visible, crop if needed

Duplicate your tag and on your copy layer
Adjust-Gaussian Blur 5
Properties - Blend Mode Soft Light
Back to your Original tag layer add a little radiance
Merge Visible

Add your name copy write and license and you are done!

Thank you for trying my tut!


post signature

August 17, 2014

Angelic - CT PTU Tut - Heaven Scent by Kissing Kate


I used PSP X4 but any other version will work

Scrapkit

A lovely kit by Kissing Kate "Heaven Scent" . Check out her Blog 

Tube

I am using a beautiful tube by Trinita available 

Filters
EC 4 - Gradient Glow
Xero - Radiance
Penta - Dots
Photo Effects

Font
FTU Sverige

Mask
Rocked by Rachel 
HERE


Here We Go!
 
Open Image 700 x 700
C/P your tube of choice onto center of your canvas
EL 14 resize to 105 
C/P to the background
EL Frame 1 resize to 70
Image Free Rotate 15.0 Left
C/P in front of EL 14 to the right
Magic Wand click inside Frame
New Layer
Expand by 6 
Choose two colors from your tube
I chose the RED and Yellow
Make a gradient 
Flood Fill inside your frame
Now take and C/P your closeup of the tube
Invert None
Duplicate close up tube layer
On your copy 
Adjust-Blur-Gaussian 6
Properties-Screen
On your original close up
Properties-Luminance
Lower Opacity as you like
EL 25 resize to 80 
C/P to the right behind your tube
EL 50 resize to 50
Flip Horizontal and place behind your tube to the right
EL 49 resize to 70
C/P behind up  behind your tube to the right
Duplicate this layer
Flip Horizontal and place to the left
EL 70 resize to 30
C/P to the bottom left
EL 80 resize to 70
C/P in the background to the bottom
EL 20 resize to 30
C/P and place to the right
EL 19 resize to resize to 40
C/P and place to the left
Duplicate this layer
and place to the right
EL 18 resize to 60
C/P tot her bottom in from of your main tube
Take same element resize to 30
C/P to the middle bottom of your main tube 
EL 15 resize to 10
C/P to the bottom
EL 23 Sparkles resize to 80
C/P and place on top over Frame EL
If you are happy with your creation
Merge Visible
I added a blast of Radiance
Add your mask -  I used paper 7 for mine and I also duplicated my mask twice
Add your Name, Copywrite, License
Save as PNG
post signature

August 9, 2014

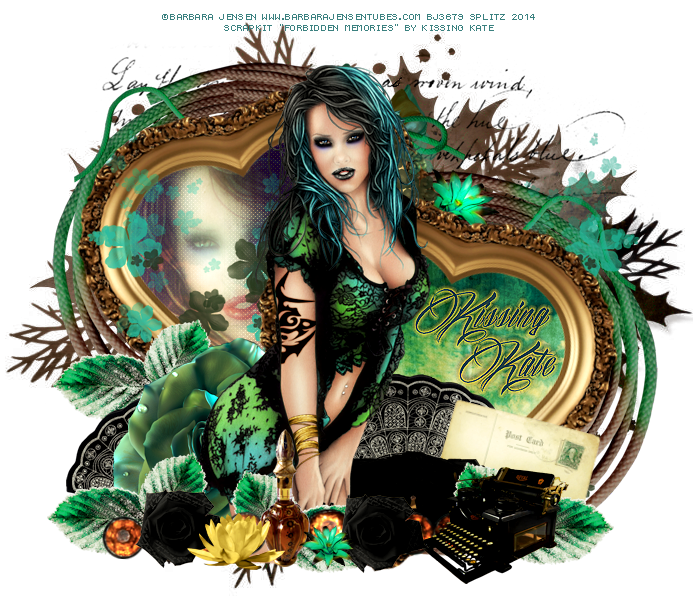
Waiting - CT PTU Tutorial - Forbidden Memories by Kissing Kate


Program
PSP X4 or any other program will work!
Scrapkit
A beautiful kit by Kissing Kate named "Forbidden memories"
This lovely kit has some beautiful colors of Teal, Greens and Browns and some gorgeous unique elements!
Available HERE
Tube
I am using the lovely work of Barbara Jensen
HERE
Mask
I am using a lovely mask by Dee available HERE
Filters
Xero - Soft Vignette
Xero - Radiance
Photo Effects
Eye Candy 4 - Gradient Glow

Here We Go!

Open new image 700 x 700
C/P your tube of choice
El 4 Frame resize to 50
Image-Free Rotate 10.0
C/P behind your tube
Duplicate the frame, flip hortizontal
and place on other side behind tube
Take paper 5 resize to 40
Take your magic wand
Click inside either frame
Selections expand
C/P paper inside frame
Selections Invert Delete
Deselect
Follow these same steps for second frame
but do not Deselect
Take your closeup tube
C/P behind your frame
Selections Invert Delete
On your layers palette, duplicate your tube
Adjust-Gaussian 6.0
Properties - Screen
On your original tube layer
Properties-Multiply
Lower Opacity to your liking
On your COPY tube layer
Effects-Xero-Soft Vignette
with the following settings
( remember you can always change these to your liking)
Horizontal-Sharp-Background Color-Diagonal Mesh
6, -71, 2, 255
El 18 resize to 40 
C/P and place at bottom right behind tube
El 14 resize to 40 
C/P and place to the right bottom behind tube

EL 11 resize to 40
C/P and place behind EL 14
EL 15 resize to 10
C/P to the bottom in front of your tube
EL 9 resize to 20
C/P and place to the bottom
EL 29 resize to 30
C?P and place at the bottom
EL Frame 1 Resize to 60
C/P  and place behind frame
Duplicate this layer
Flip horizontal and place  that layer behind frame
(You can see my tag for reference)
EL 31 resize to 40
C/P and place to the bottom in front of tube
EL 5 resize t0 30
C/P  and place to the bottom
Duplicate twice and scatter these layers as you would like!
EL 55 resize to 20
C/P and place at the bottom
EL 12 resize to 30
Flip Horizontal C/P and place to the bottom
EL 53 resize to 90
C/P and place behind in the background with some of the WA showing 
Add your mask of choice!
If you are happy with your tag you can merge visible
Crop if needed!
I added a little Radiance to my  finished tag and also
Photo-Effects-Film & Filters-Vibriant Foliage
I wanted to make those beautiful teals and greens pop!
For the Name - I added a little Gradient Glow
Effects-Edge Effects-Sharpen
Add your Copy write, license and name!
Thank you for trying my tut. I would love to see what you make!
post signature

July 19, 2014

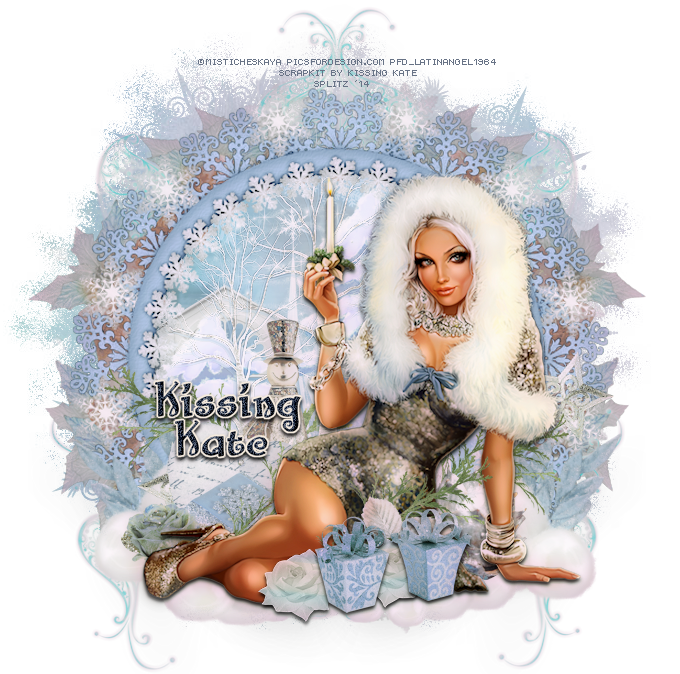
"Paris Love" - CT PTU Tutorial - Romantique by Kissing Kate


MATERIALS
Program
PSP X4 or any other version will work

Scrapkit
Lovely new kit by Kissing Kate named Romantique
HERE

Tube
The beautiful work of Misticheskaya. You need a license to use her work and you can get that 
HERE

Font
PP Hip20s
HERE

Filters
Radiance

Don't forget to add your drop shadows!
Here We Go!

Open New Image 700 x 700 
You can crop later when done!
Take your tube of choice, resize to your liking
c/p onto your canvas
Take Frame 1, resize to 70
c/p behind your tube
Take your Magic Wand
Click inside Frame
Expand by 4
Take a paper of choice, I am using Paper 4
c/p behind frame
Selections-Inverts-Delete
Do Not DESELECT
Take EL 54 Sparkles
c/p onto paper
Selections-Delete
DESELECT
EL 37 Flower resize to 30
Image-Flip Vertical
c/p to thr bottom right of your frame
Go to Layers Palette
Right Click-Duplicate
Place copy on left side of frame
EL 69 Leaves resize to 40
c/p to bottom left of frame
Take EL 32 Eiffel Tower resize to 70
c/p to the left side in front of frame
Take EL 25 Book resize to 20
c/p and place in front of your tube
**Optional**
I wanted to make it look as if the tube fingers is touching the book.
If you want to do this just grab your eraser tool, round 5
make sure you are on the Book Layer, it also helps to make your image larger.
Now where your tube's finger is, you start erasing little by little downward
until her finger is in full view in front of book
EL 53 Postcards resize to 30
Go to 
Image-Free Rotate-right 10
c/p and place bottom right in front of  Frame
EL 46 Clock resize to 30
Go to 
Image-Free Rotate-Right 10
c/p to the left bottom
EL 68 Musical Note resize to 60
Go to Adjust-Sharpen
c/p right behind EL 46 Clock
EL 66 Bottle resize to 30
c/p  and place at bottom in front of tube
EL 24 Car resize to 40
Image-Horizontal Flip
c/p and place behind EL 53 Postcards
EL 17 Accordian resize 50
c/p and place  to the right bottom behind Car
EL 64 and 71 Flowers, I resized them to 20 
c/p and scatter them at the bottom
EL 57 resize to 50
Adjust-Sharpen
c/p and place at bottom left
If you are happy and simply love your tag, Merge Visible.
Add your mask of choice
Layers- New Raster Layer
Go to your Layers Palette and bring the new layer to bottom
Take your magic wand and click on new layer
Take your paper of choice I am using Paper 9
c/p to new layer
Take your mask of choice
Go to 
Layers-New Mask Layer
From Image
Take your mask of choice
Click OK
Merge Group-Selections None-Merge Visible
I blasted my tag with Radiance but as always this is optional :D
Add your Name, Copy write and License Info
Save as PNG!
post signature

July 12, 2014

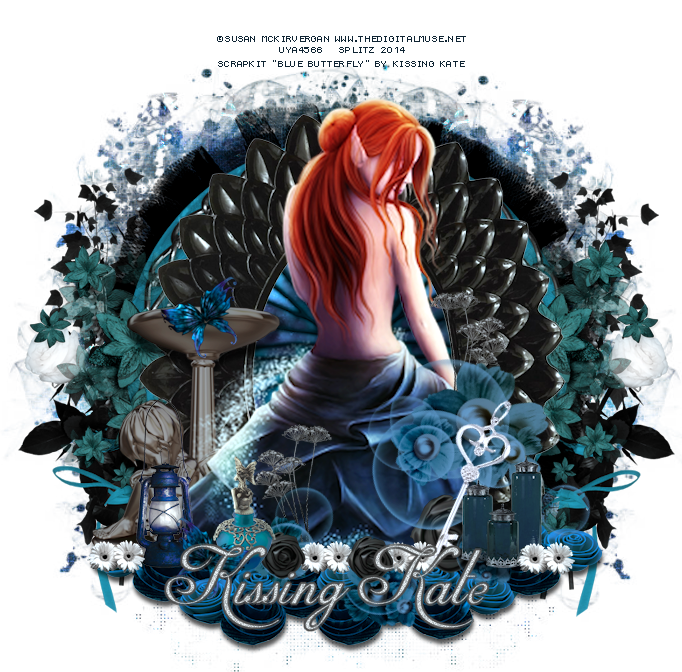
"Blue Butterfly" - CT PTU Tutorial - Kissing Kate


Blue Butterfly

Materials

PSP X4
Any other version will work
 Scrapkit

A lovely scrapkit by Kissing Kate named Blue Butterfly
HERE

Tube
I am using the lovely work of  Susan McKirvergan
You need a license to use her work
She was formerly at Up Your Art

Filters
Xero Bad Dream, Porcelain

Mask
I am using one by Vix
HERE
Font
Mirella
Remember to add your drop shadows!
Here We Go!
Open New Image 700 x 700
Take your tube, I am using the close-up but you can chose, re-size  to 80
copy & paste onto your canvas
Take Frame 2 , re-size to 80
copy & paste behind your tube
Take your Magic Wand, click inside Frame 1, 
Selections-Modify-Expand 6
Take Element 44, make bigger if needed
copy & paste behind your frame
Selections-Invert-Delete-Selections None
Take Frame 1 , Resize to 80 
copy & paste behind Frame Frame 2
Take Element 43. re-size to 50
copy & paste to the left side of Frame 1
Take Element 5 re-size to 90
copy & paste to right side of Frame1
Go to Layers Pallet
Right click-Duplicate on Element 5
Image-Flip Horizontal,
copy & paste and place on other side of  behind frames
Take Element 23, re-size to 60
copy & paste, place the right side behind frame1 in your background
Go to Layers Pallet
Right click-Duplicate on Element 23
Image-Flip Horizontal,
copy & paste and place on other side of  behind frame 1
Take Element 3, re-size to 30
copy & paste and place on right side of Frame
Now I wanted to make some sort of Ground so I took Element 40, re-sized it and duplicated this layer 2 times so I will have now 3 layers. I placed them right underneath my tube. You can place as you like. Once you are happy with it Go to you layers pallet, and Merge down these 3 layers and add a drop shadow
Take Element 44 re-size to 30
Image - Free Rotate-Left 25 
place at bottom, I duplicated this layer and placed another one up above tube
Take Element 41, re-size by 30, I gave it a little Radiance to make it darker and I placed at bottom left side by fountain
Take Element 36, re-size to 20 and scatter them around as you would like
Take Element 4, resize to 50
Image - Rotate Right 
copy & paste to right in front of your tube
Take Element 13, re-size to 30
copy & paste and place anywhere on your tag
You can place a few of these around your tag if u wish
Take Element 38, re-size to 30
copy & paste and place on the bottom of your tag
Element 14, re-size to 40
Adjust-Sharpen
copy & paste, place on the bottom to your right
Once you are happy with your creation 
Go to your main tube
Layers Palette-Right CLick-Duplicate
On your copy of tube, 
Adjust-Blur-Guassian Blur 3.0
Now go to
 Effects-Xero-Bad Dream
Settings:
70-131-Blue
Go back to layers palette
Properties-Blend Mode-Soft Light
Lower Opacity to 61 or whatever you like
Add you mask if you are using one
Merge Visible
I blasted my tag with some Porcelain
Crop to you liking
**Add your Name, Copywrite and License Info**
Save your creation as PNG
Thank you for trying my tut!
post signature

March 17, 2014

CT Tags - Springtime In Paris - Collab kit by Tiny Turtle Designs and Kissing Kate

Ahh Paris, the city of Love! - This beautiful kit made by TTD and Kissing Kate is perfect for all those beautiful springtime designs - Soft colors of orange, pinks and wonderful realistic elements!. This kit is available exclusively at Tiny Turtle Designs store HERE

CT Tags using the gorgeous art of Verymany and Alex Prihodko


post signature

November 10, 2013

CT Tags - Pussycat, Pussycat by Kissing Kate

CT tags made using the fabulous kit by Kissing Kate - Pussycat, Pussycat - You can purchase her kits HERE !


CT tags using the beautiful art of VM available here and Jennifer Janesko available at CDO


post signature

October 27, 2013

CT Tags and Extras - Haunted Happenings by Kissing Kate

Ct tags and extras using a hauntingly beauitufl kit by Kissing Kate - "Haunted Happenings" - Visit Cat here to see all her gorgeous work and to find out where she she sells!

CT taggs made using the gorgeous art of Zlata_M and Mitischeskaya both available at Pics For Design


Extras!!


post signature

October 8, 2013

CT Tags and Extras - Vampalicious by Kissing Kate

Fabby kit by Kissing Kate called Vampalicious! .. Visit Cat here :D .. CT Tags made using the lovely art of Barbara Jensen available here and Di Halim available here.


Extras


post signature