Pages

Showing posts with label Karra's Kreative Korner. Show all posts

January 31, 2015

Blue for You - CT PTU - Lost In Love by Karra's Kreative Korner


Beautiful kit by Karra's Kreative Korner named 'Lost In Love"

Beautiful art by Barbara Jensen. You need alicense to use her work and you can get both  HERE

Mask by Rachel HERE

No Outside filters used

FTU Font Mardian Demo

HERE WE GO!


Open new image 700 x 700
C/P tube of choice onto your canvas. C/P  Frame 1 behind tube, magic wand, click inside frame expand by 5. El Heart Frame resize larger to 110. C/P and place inside Frame 1 selections, Invert, Delete, Selections None. 
El Flower 3 resize to 3. make several layers and frame behind the Heart to the left (see tag for reference). Once your done merge down these layers, duplicate, flip horizontal and place to the right. 
El Flowers resize to 60 C/P and place on top left of frame, duplicate this layer, flip horizontal and place to the right. Back to Flowers El, Rotate left, C/P and place to the left of frame, flip horizontal and place to the right.  El Leaves resize to 50 and we will follow the same steps as with Flower 3. Go back to El Leaves Rotate Left. C/P and place towards top behind frame.  El Ribbon 1 resize to 60 Edge Effects-Enhance  and place as wish behind your frame. I duplicated this layer 3 times and scattered them around frame. El Pillow resize to 60 C/P and place to the bottom left by tube. El Petals resize to 60 C/P and place underneath Pillow and tube to the left, duplicate this layer flip horizontal and place to the right. El Candy, Flower 1 and Flower 2 resize to 20 c/p and place accordingly to the bottom left. Duplicate Flower 1 and 2 and place to the bottom right. El Gift resize to 30 c/p and place to the bottom by tube El Love Letter resize to 20, Enhance Edges c/p and place to the bottom left. El Lollipop 1 & 2 resize to 50 C/P and place to the right side of frame behind tube. I added the sparkles over the tube and the Sunburst inside the Frame. El Bubbles resize to 70 C/P and place behind tube, center. 
Go Back to main tube layer. Duplicate. On Copy Guassian Blur 3.0 Properties Hardlight lower opacity to 50. I added a shadow on my tube with these settings:
2, -11, 9.0, 5.0
Merge Tag
OPTIONAL:
I duplicated my merged tag, on copy Guassian Blur 3.0 Properties Soft Light opacity 53. Add your mask. I used Paper 10 for mine and duplicated 2 times. 

Add your Name, License and Copy Write info
Merge and save as PNG
Crop if you need to!
Thanks for looking!!


post signature

December 1, 2014

Winter Wonder - CT Ptu Tut "Winter Splendor" by Karra's Kreative Korner


I used PSP X6 to create this tag but any other version will work.

I am using a beautiful kit by Karra's Kreative korner named "Winter Splendor"

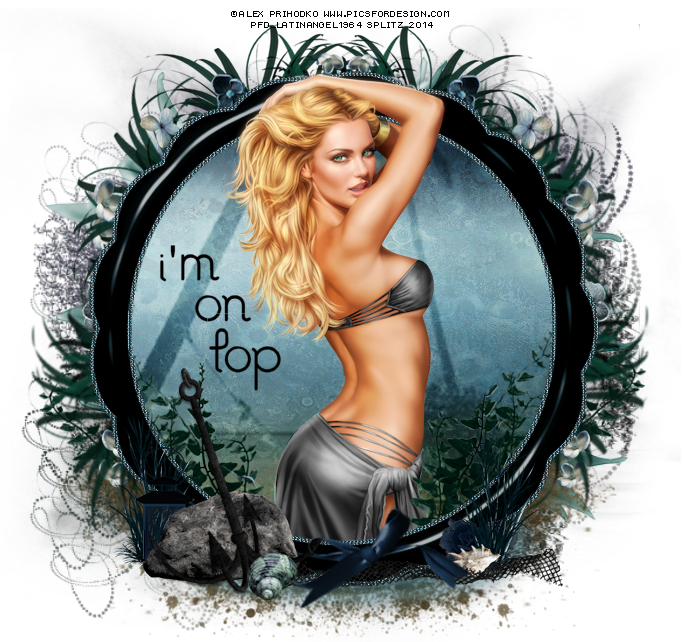
Beautiful tube by Misticheskaya. You need a license to use her art and you can get both HERE

FTU Font Santa's Sleigh

Filters
Photo Effects - Film and Filters

Mask is by Moonbeams and Spiderwebs HERE

Here We Go!
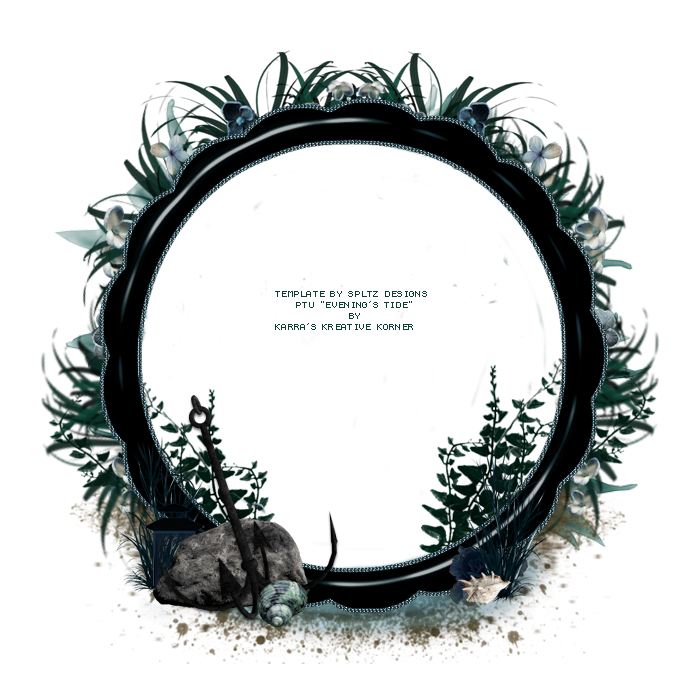
Open new image 700 x 700. C/P tube of choice onto the center of your canvas. El Window, c/p and place over tube. Magic Wand and select each of the window panes, expand by 10. Go to tube layer
Selections, Invert, Delete, Deselect. El Tree 2 resize 50 c/p and place inside frame by tube to the left duplicate this layer and place behind tube to the right. El Snowflake Scatter resize to 50 and place over tree to the left. 
El Deco,  Free Rotate Left 50 resize to 60 c/p to the bottom left of frame, duplicate layer flip horizontal and place above top left of frame. Merge Down these two layers. El Ornaments and Pinecones resize to 30 c/p and place to the bottom left. El Giftbox resize to 30 c/p to the bottom left, El Favor Box resize to 40 c/p and place to the bottom left. Go Back to El Deco rtesize to 50 c/p and place to the bottom right. El Gift resize to 50 c/p and place to the bottom right. El Branch resize to 40, c/p and place to the top left of Frame duplicate this layer and place to the bottom right. Take Frame 4 c/p and place to the back behind first frame. Add Your Mask. Go to main tube layer, duplicate. On Copy Gaussian Blur 6.0 Properties Screen.
Merge Your tag!
I added Photo Effect Film and Filters
Glamour, Sunset, Filter Color #ff5a01
Density 15
For then Name I used paper 4, bevel and drop shadow!
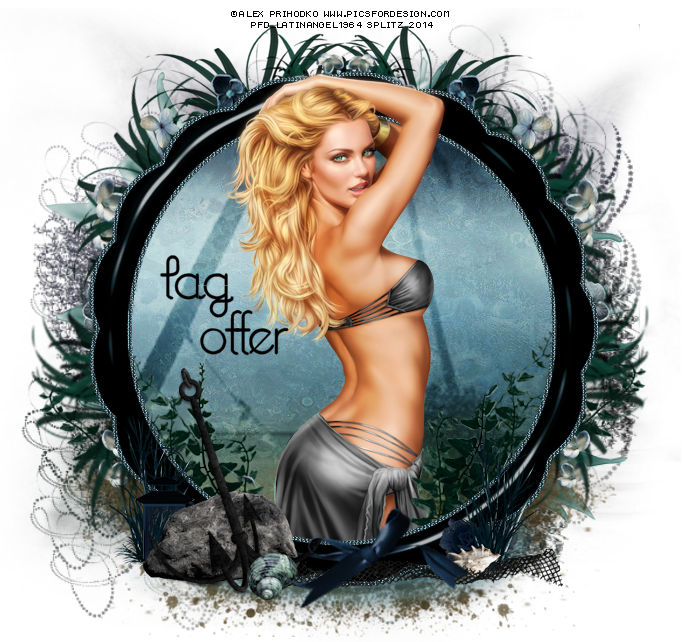
Add your Name, License and Copy write. Save as PNG
Thanks for Looking!

November 9, 2014

Thankful - CT PTU Tut - We Give Thanks by Karra's Kreative Korner


I used PSP X6 to create this tag but any other version will work!

Beautiful scrapkit by Karra's Kreative Korner "We Give Thanks" . Visit her HERE

Beautiful tube by Keith Garvey. You need a license to use his work and you can get both HERE

Mask by Dee - HERE

FTU Font SVERIGE

Filters
Toadies - Mosiac Plus
Xero Radiance (optional)

Window Template made by me!

Remember your drop shadows!

HERE WE GO!!

Open new image 700 x 700, c/p tube of choice onto the center of your canvas. Take Window Template included in this tut c/p and place behind tube, magic wand click inside each frame c/p paper of choice, Selections Invert Delete. KEEP SELECTED. Take El Mesh, I am going to use it as a curtain Free Rotate 10 Left. C/P to the left of the frame HIT DELETE! DESELECT! ... Duplicate this layer Flip horizontal  to the other side.  I duplicated the mesh layers twice on each side to make them stand out more. El Lace resize to 90 c/p and place to the top inside of the window template. Back to the Paper, Effects Toadies Plain Mosiac Blur 2 .. EL Clock resize to 20 c/p and place to the background to the right.
El Basket resize to 40 c/p and place to the left in front of your tube. El Cornucopia resize to 40 c/p and place to the left behind tube. El Flower 6 resize to 50 c/p and place to the far left of the frame El Leaves 1 resize to 50 c/p and place to the far left behind flower. I merged down the Cornucopia, Flower and Leaves, Duplicated this layer Flip Horizontal and place to the right side of Frame. El Table resize to 90 /p and place to the back behind tube and elements. El Turkey resize to 30 c/p and on top of table to the right. El Teapot resize to 30 c/p and place to thr right on top of table. Repeat the above steps for El Mash potatoes. El pinecones resize to 20 c/p and place to far left, duplicatelayer  flip horizontal and place to far right. El Candles resize to 20 c/p and place on table to the left. Ribbon 3 resize to 80 c/p and place to back in the bottom behind tube. El Plant resize to 40 c/p to the right duplicate this layer and place to the left. El bird resize to 20 c/p and place to the bottom wherever u may like. El Football resize to 30 c/p and place to the bottom. If your happy with your tag great. On your tube layer. Duplicate, Gaussian Blur 6.0 Properties Hardlight Opacity 60.
Merge Visible. Add your mask of choice I used Paper 6.

Merge Visible again. Add your name Copy Write and License info
Save as PNG

Thanks for looking!


post signature

October 12, 2014

Sweetly Broken - CT PTU Tut - Eerie Enchantment by Karra's Kreative Korner


I am using PSP X6 but any other version will work.

Scrapkit is a beautiful one from Karra's Kreative Korner called "Eerie Enchantment"
You can visit her HERE

I am using the lovely work of Enys Guerrero. This is a Bonus tube that I am using available. But she has some lovely tubes and you can purchase HERE

Mask is by Dee HERE

FTU Font Chopin Script

Filters
Xero-Radiance

HERE WE GO!
Open new Image 700 x 700
C/P your choice of tube onto the center of your canvas
EL Heart Frame 4, C/P and place behind your tube, Duplicate this layer and Merge Down
Go to Adjust - Hue Map - Default settings - Neon Glow 
El Flower Frame 2 C/P behind Frame 4. Duplicate this layer and Merge Down. Go to Effects - Xero - Radiance with these settings:
255-188-128-255 then hit OK. Place this layer over to the left, Duplicate again, Flip Horizontal and place over to the right (See tag for reference)
Magic Wand, click inside your  Heart Frame -Take Paper 15 C/P  and place behind your frame
  Selections - modify Expand by 10
 Selections Invert Delete
Do Not Deselect
Taker a closeup of your tube C/P and place to the right Hit Delete
Duplicate your closeup layer. Adjust Gaussian Blur 6 Properties Screen
On original closeup tube layer Properties Luminance. El Cobwebs 2 C/P and place over your closeup tube layer. EL Moss 2 resize to 80, C/P and place on the left side of the Flower Frame.
El Fan resize to 50 Flip Horizontal and place to the bottom. EL Pinecones resize to 30. Adjust - Hue Saturation - Colorize 
Hue: 0 Saturation 81
C/P and place by fan. Duplicate this layer twice, flip horizontal and place behind one on each side EL Apples resize to 20 C/P and place by pinecones. El Key resize to 30 C/P and place behind Apples. El Birdcage resize to 50 C/P and place to the left behind tube.
and last EL Bats resize to 50 and place where you would like i did mine to the top left and duplicated the layer and place it to the top right.
Merge Visible, I added a touch of Radiance.
Add your Mask ( I used Paper 14 for mine)  name license and CR info
Merge Visible and save as PNG!
Thank you for looking!
post signature

October 5, 2014

Fall Dusk - CT PTU Tut - Colors of Autumn by Karra's Kreative Korner


I used PSP X6 to create my tag but any other version will work

Scrapkit is "The Colors of Autumn". A beautiful new kit by Karra's Kreative Korner available HERE and HERE

Tube is a lovely one by Alex Prihodko. You need a license to use his work and you can get both HERE

Mask is one that I made for a challenge at Pimpin PSPer's Forum

FTU Font Rainy Wind

Filters 
Xero Radiance

HERE WE GO!
Open New Image 700 x 700
C/P your tube of choice onto your canvas
EL Frame 4 resize to 90 C/P and place behind your tube
Magic Wand click inside your frame - Selections Modify Expand by 5 - C/P paper 1 - Selections Invert Delete Deselect
EL Ground  C/P and place underneath your tube
Add a drop shadow to your tube. El Basket resize to 
30, C/P and place at the bottom middle of your tube
EL Apples resize to 20 Rotate Left, C/P and place right by the rim of your basket. 
(We want to make  it look like the apples are in the basket)
Take your eraser tool, Round 5 and start erasing the bottom part of the apples until you see the rim of the Basket
It helps if you magnify the image, i do about 300 percent!
EL Deco 2 resize to 30, we are doing the same steps as we did with the apples!
EL Flower 2 again we follow the sames steps as above!
EL Pumpkin resize to 20 C/P and place to bottom by basket.
El Rabbit resize to 30 and place to the right by Basket. El Floral Arrangement resize to 30 C/P and place towards bottom
El Bench resize to 70 C/P and place to the left behind tube
EL Deco 3 resize to 20 C/P and place on top of bench add drop shadow.
El Flower 1 resize to 10 C/P and place by El Deco 3. Duplicate the flower layer 2 more times and scater those to the bottom. El umbrella resize to 40 C/P and place by Bench.
El Mushroom resize to 20 C/P and place wherever you my like. I duplicated this layer twice to scatter them around.

Lets dress up the inside of your frame!
EL Plant 2 resize to 40 C/P and place to the right inside frame, Duplicate this layer Flip Horizontal and place that layer to the right
EL Wind resize to 30 C/P and place inside your frame on top
Magic Wand click inside frame, take EL Tree 1 - C/P and place towards back behind Plant
Selections Invert Delete
Deselect
Make sure your Wind is in front of the tree
El Sun resize to 70 C/P and place right behind the tree
Last EL Fawn resize to 50 C/P and place behind Plant
I used Flowers 1 and 3 and placed towards the back of my frame
If you are happy with your tag great!

Merge Visible, Crop if Needed
I added some Xero Radiance
Add your mask, Name CR and License
Your done!
Thank you for looking!


post signature

October 4, 2014

CT Tags and Extras - Ladies N Lockdown - Karra's Kreative Korner

Bad Azz and much attitude!...That is how I describe the new kit by Karra's Kreative Korner
"Ladies N Lockdown"

Available HERE and HERE

CT Tags using the fab work of Ismael Rac and Keith Garvey


Extras!!


post signature

September 21, 2014

Autumn Flair - CT PTU Tut - Autumn's Aroma by Karra's Kreative Korner


I used PSP X 6 to create this tag but any other version will work

Scrapkit is a unique and beautifully done kit by Karra's Kreative Korner names Autuns' Aroma. Available HERE and HERE

Using the beautiful work of Trinita available HERE

Texture by Vix HERE
I used the one in Set 2 3rd from right

Font is FTU Billy Angel

Here we go!

Don't Forget your drop shadows!

Open New Image 700 x 700
C/P your tube of choice

EL Frame 4 - C/P and place behind your tube
Magic Wand, click inside frame  Selections - Expand by 4 -
take your Texture of choice, Adjust - Hue Saturation - 
Hue: 233 Saturation 111
C/P and place behind your frame
 Selections - Invert - Delete
Do Not Deselect
Take the closeup of your tube, C/P and place on your texture and place it to your liking, HIT DELETE

On your Closeup tube layer - Duplicate - On your copy Gaussian Blur 6
Properties - Softlight. On your Original Tube Layer - Properties Screen - Opacity 50 THEN 
Duplicate that layer. Once your are happy with it we can move on :D

**Optional - Same Texture - Saturation Zero
C/P  and place in front of the first Texture layer- Selections - Delete
If you notice it will give some shadow to your close up  layers and tone down the brightness.**

EL Flowers 2 resize to 80, C/P and place to the bottom left. Duplicate this layer, flip horizontal, flip vertical and place to the top right. EL Pillows resize to 40 C/P and place by your tube to the bottom. EL Basket resize to 30 C/P and place behind Pillows. EL Heart Deco resize to 30 and place behind pillows. EL Flower Pots resize to 25 C/P and place to the bottom left.
EL Pinecones resize to 50 C/P and place to far bottom left, duplicate this layer flip horizontal and place to the bottom far right behind tube. EL Fence 2 resize to 70 and line it up with your tube to the bottom. EL Flower 3 resize to 30 C/P and place to the bottom to cover whatever is left showing of the tube. EL Passion Fruit resize to 20 C/P and place by Flower 3.
Duplicate Passions Fruit and place right on the edge of EL Basket.
Take your eraser tool, round 5 and erase the bottom of the Passion Fruit to make it look like its in the basket.
For the background behind the frame and elements. I used EL Tree .. Eraser tool and erase tree limb. Duplicate this layer 4 times and framed it around my frame
El Leaves 2 resize to 30 C/P and place on your closeup tube layers, duplicate this layer 3 times and place as wanted
Effects - Edge Effects - Enhance

You are almost done!

Go to your main tube layer - duplicate
Adjst - Blur - Gaussian Blur 3.0 Properties Soft light

Add your mask, I used Paper 8 for mine!

For the name .. I went to Properties - Layers Styles - Bevel
Effects - Enhance Edges.
Duplicate Layer - Properties Soft Light
Drop Shadow

If your happy with your tag..merge visible!
Give it a touch of Radiance
Add your name copy write and license info
Save As PNG!


Thanks for looking!


post signature

September 16, 2014

All Hollow's Night - CT PTU Tut - Something Wicked by Karras Kreative Korner


I created this tag using PSP X6 but any other version will work

Scrapkit is a wickedly fabulous kit by Karra's Kreative Korner named Something Wicked
Available HERE and HERE

I am using the beautiful work of Alex Prihodko. You need a license to use his art and you can get both HERE

Mask is by Vaybs HERE

FTU Font NIGHTMARE

Filters
DSB Flux - Bright Noise
Xero - Radiance


Here We Go!


Open new Image 700 x 700
C/P your tube onto your canvas
Frame 3 C/P and place behind your tube
Take your magic wand click inside Frame
Selections - Expand by 4
C/P paper 6
Selections - Inverts - Delete
 Working on the inside of the frame
Cloud resize to 40
C/P to the upper left duplicate this layer and place to the upper right
Haunted House - resize to 80
C/P to the background
Tree resize to 20 
C/P  and duplicate this layer and scatter them as you wish
Take your eraser tool and erase any excess
Fence 
C/P to to the background
Tombstone resize to 40
Image - Free Rotate - Left 15
C/P to bottom right
Pumpkin resize to 30
C/P to the left
Working with the Outside of the Frame
Branch
C/P to the left, duplicate this layer and place to the right
Coffin resize to 30 C/P to the bottom
Book resize to 20 C/P and place on top of Coffin
Flower 1 and 4 resize to 20 and scatter them at the bottom as you wish
Leaf branch resize to 60
C/P and place to the bottom
Owl resize to 20 place to the bottom
Butterfly resize to 20
Flip Horizontal C/P and place to the bottom
Folded Ribbon resize to 50 C/P and place to the bottom right
Glitter Scatter Resize to 60
C/P behind your elements in front of tube (see Tag for Reference)


I added the following Elements to background behind Frame
Wired Cross
and Swirls

And to bottom I added the cloud element to create a "fog" ground

If your happy with your tag great!

Go back to your main tube layer
Duplicate. On your copy layer
Adjust - Blur - Gaussian Blur 6.0
Properties - Overlay - Opacity to 71 or whatever you may like

For the name
Type out Name, convert to Raster
Selections All - Float - Defloat - Add New layer Selections - Expand by 2
Flood Fill Black
New Layer
Selections - Expand by 2
Flood Fill with #d09454
Effects - DSB Flux - Bright Noise 
Mix 55
Back to your Original Name Layer
Properties
I used Emboss and Bevel
You can play around with the setting till you are happy with your result!

Merge Visible
Add your name License and Copywrite info
Crop if needed and you are done!

Thanks for looking!


post signature

August 24, 2014

Soft Autumn Breeze - CT PTU TUT - Autumn's Palette by Karra's Kreative Korner

Materials

PSP X4

A beautiful and soft scrap kit by Karra's Kreative Korner named
Autumns's Palette
Available HERE and HERE
Gorgeous Art is an Exclusive from Alehandra Vanhek available HERE

Beautiful Mask is by Dee from her Fall collection from last year
Available HERE

No outside filters

FTU Font is Sverige Script

HERE WE GO!

Open new image 700 x 700
C/P  your tube of choice onto the center of your canvas
Take Frame 4, no resizing needed
C/P and place behind your frame
Take your Magic Wand
Click inside Frame
Selections-Expand-Modify by 5
Take Paper 9
C/P behind frame
Selections-Invert-Delete
Deselect
Take EL Tree, no resizing
take your eraser tool, erase part of the branch
C/P and place to the left bottom behind frame
Duplicate this layer
Flip Horizontal and place to the right bottom of frame
**TIP**
I duplicated both tree layers to make it darker
Duplicate the Tree layers on both sides and move those up behind frame
(see tag for reference)
EL Ribbon 1 resize to 90
C/P and place to the bottom of your frame in front of your tube
Take your eraser tool and erase any excess of the tube
Take EL Plant 1 resize to 90
C/P right behind  ribbon to the left
Duplicate this layer, flip horizontal and place to other side of behind ribbon
The following Elements I used to place at the bottom in front of Ribbon
Elements
Books
Charm
Gift
Flower 1
Flower 4
Jar
Paint brushes
Pine cone
Leaves 5
You can scatter these elements as you wish or use my tag for reference
El Grass resize to 50
C/P and place behind your tube to the right
EL Leaves 6 resize to 90
C/P and place right behind your tube
Same EL resize by 80
C/P in front of your towards bottom
EL Wind resize to 70
C/P and place in front of tube
Take eraser tool and erase any sparkles on her face

EL Leaves 3 resize to 90
C/P and place right behind your frame to the left
Duplicate this layer and place that layer to the right 
If you are happy with your tag
Merge Visible
Crop if needed
Add your mask
Name, Copy Write
Duplicate your tag
On your COPY layer
Adjust - Blur - Gaussian Blue 6.0
Properties - Blend Mode - Hardlight
Lower Opacity to 60
and Save as PNG!

post signature

July 19, 2014

Star of India - CT PTU Tutorial - Diwali Wishes - Karra's Kreative Korner

Star of India
Program of Choice
PSP X4 but any other version will work fine!
Scrapkit
A Stunningly Beautiful kit by Karra's Kreative Korner "Diwali Wishes"
Available for Purchase HERE and HERE
Tube of Choice
I am using the beautiful Viviaan by Zlata_m
HERE
Font of Choice
Prognostic
HERE
Mask of Choice
I am using one by Dee from her Floral Masks
HERE
Filters
Radiance
Porcelain
Abbreviations
C/P - copy and paste
EL - Element
Here We Go!
Remember to add your drop shadows as you go!
New Image 700 x 700
C/P your tube of choice onto your canvas
Take EL Frame 4, resize to 95
c/p behind your tube
Take yor magic wand, click inside your frame
Selections-Modify-Expand by 4
Take your choice of paper I am using Paper 8
c/p  behind frame
Selections-Inverts-Delete
DO NOT DESELECT!~
Take EL India Skyline
c/p  behind frame
place at the middle of frame
Selections-Inverts-Delete
DO NOT DESELECT!~
Take EL Sand
c/p inside frame, in front of skyline towards bottom
Selections-Delete
DO NOT DESELECT
Take EL Bead Curtain
c/p behind frame towards top
Selections-Delete
Selections-None
Now for the elements! This  kit has some beautiful elements I wish I can use them all!
EL Box and EL Candles - resize to your liking 
c/p at bottom right  behind tube
EL Pillows - re-size to 70
c/p and place behind tube
EL Wicker basket, resize to 20 
c/p on left side of your tube
EL Vase, resize to 20
c/p behind Wicker Basket
EL Sun - resize to 80 
c/p onto your background
EL Leaves 3 resize to 40 and you can scatter these as you would like on your tag or like I did
c/p on on each side of behind your elements
EL Flower 3 and Flower 1 resize to 10 and these also you can cp and scatter them as you want!
EL Dishes, resize to 10 
c/p to the bottom in front of your tube
EL Rice, resize to 30
c/p to the bottom
EL Hanging Deco resize to 50
c/p to left side of frame
Go to Layers Palette, right click Duplicate
Image-Horizontal and place on right side of frame
EL Cranes resize to 50 
c/p in front of tube
EL Bow 3 resize to 20
c/p at bottom in front of EL Dishes
I added some EL Sparkles 1 , resize to 80
c/p to background and also EL Palm Tree
resize to 70
c/p to background, resized that same elements smaller 
c/p to background also.
Merge Visible
Add your mask of choice
Layers- New Raster Layer
Go to your Layers Palette and bring the new layer to bottom
Take your magic wand and click on new layer
Take your paper of choice I am using Paper 14
Might have to resize a little larger
c/p to new layer
Take your mask of choice
Go to 
Layers-New Mask Layer
From Image
Take your mask of choice
Click OK
Merge Group-Selections None
I like  my masks to stand out so I duplicated the mask, Merged Down duplicated it, flip horizontal, but that is my choice. You can do it whichever way you like :D
I blasted it with some Porcelain and Radiance, but as always you can play around with these filters to get it where you want!
Dont forget to add your copywrite and license info and name!
Save as PNG
Thank you for trying my TUT!
post signature

June 18, 2014

CT Tags, Cluster Freebie and Extras - Beauty by the Bayside - Karra's Kreative Korner

A beautiful and so delicate new kit by Karra's Kreative Korner "Beauty by the Bayside"! This gorgeous kit is available at Pics For Design and Pimpin PSPer's Warehouse. Visit Karra at her blog to keep up with all gorgeous work HERE

CT Tags using the gorgeous art of Keith Garvey and Ellie Milk


Cluster Preview


Cluster (right click and save)
Extras!

June 15, 2014

CT Tags, Cluster Freebie and Extras - Evening's Tide by Karra's Kreative Korner

There is nothing like a night out on the beach! Karra's Kreative Korner has made this beautiful kit reflecting just that!. Beautiful papers and gorgeous elements to bring to life those beautiful evenings on your creations! This lovely kit can be found at Pimpin PSPers Warehouse and Pics For Design.

Tags using the gorgeous art of Alex Prihodko and VM.


Cluster Preview


Cluster (right click and save)


Tag I made using Cluster


EXTRAS


post signature

March 30, 2014

CT Tag and Facebook Timeline Freebie - Simply Spring by Karra's Kreative Korner

Another beautiful kit by Karra's Kreative Korner. Very versatile and its great not only for your Spring creations but also Summer.. Visit Karra HERE to check out all her goodies and stores!


CT Tag made using the lovely work of Alex Prihodko available at Pics for Design


AND a Facebook Timeline Freebie!!
Using the art of Verymany available at Verymany Tubes


post signature