Pages

July 20, 2014

Summer Haze - CT PTU Tut - Toes in the Sand by Jackie's Jewels


Summer Haze

Materials

Program
PSP X4 but any other version will work


Scrapkit
A fun and lovely kit by Jackie's Jewels
"Toes in the Sand"
HERE

Artwork
I am using the beautiful work of Verymany available 
HERE

Mask
Mask 117 by Wee Scotts Lass
HERE

Font
Zebra
HERE


Remember your drops shadows!

Here We Go!


Open New Image
700 x 700

Take your tube of choice, resize to your liking
c/p onto your canvas


Add your mask of choice

Layers- New Raster Layer
Go to your Layers Palette and bring the new layer to bottom
Take your magic wand and click on new layer
Take your paper of choice I am using Paper 4
c/p to new layer
Take your mask of choice
Go to 
Layers-New Mask Layer
From Image
pick your mask of choice
Click OK
Merge Group-Selections None-Merge Group


EL Towel 1 c/p and place underneath your tube
Add a slight drop shadow to your tube as well.


EL Sunhat resize to 50
c/p and place next to your tube

EL Cocktail 2 resize to 40
c/p  and place in front of tube bottom

EL Camera resize to 20
c/p and place at the bottom by Cocktail

EL Fence resize to 50
c/p to the left behind towel

EL Palm tree 1 resize to 80
c/p and place behind Fence to the left

EL Sand resize to 80
c/p and place underneath Towel to your liking
Layers Palette-Right Click-Duclicate
Image-Horizontal Flip
and arrange the sand copy as you would like

EL Palms resize to 30
c/p to the left in front of Fence

EL Lantern 2 resize to 30
c/p and place by the tube's feet

EL Umbrella resize to 90
c/p and place right behind your tube
Go to Layers Palette
on your Umbrella Layer
Right Click-Duplicate
On your Copy of Umbrella, bring that layer in front of tube
Take your eraser tool, round 25 and erase the pole in front of your tube
Now it looks like she is under the umbrella :D

EL Sun resize to 50
c/p and place right behind Palm Tree

EL Cloud resize to 30
c/p and place in the background


There are some beautiful shells, flowers and starfish elements with the kit!

I used the following:

EL Starfish 2
EL Flower 1 and 4
EL Shell 3
EL Asst Shells

I resized them small maybe 30 to 20 percent
c/p and scattered them at the bottom

EL Wooden Element resize to 20
c/p to the right behind towel

EL Gull resize to 40
c/p and place to the right of your tag on the wooden element

Now go to your main tube layer
on your layers palette
Right Click -  Duplicate
Stay on your copy layer
Adjust - Blur - Gaussian Blur 6.0
Right Click Properties
Blend Mode - Screen-Opacity 55
On your Original tube layer
Go to
Effects - Photo Effects
Films and Filters - Vivid Skin Tones

Remember you can always play around with your blends and filters to your liking!

If you are happy with your tag great!

Lets Merge Visible
Add Name, CR and License Info
Save as PNG!


post signature

July 19, 2014

"Paris Love" - CT PTU Tutorial - Romantique by Kissing Kate


MATERIALS
Program
PSP X4 or any other version will work

Scrapkit
Lovely new kit by Kissing Kate named Romantique
HERE

Tube
The beautiful work of Misticheskaya. You need a license to use her work and you can get that 
HERE

Font
PP Hip20s
HERE

Filters
Radiance

Don't forget to add your drop shadows!
Here We Go!

Open New Image 700 x 700 
You can crop later when done!
Take your tube of choice, resize to your liking
c/p onto your canvas
Take Frame 1, resize to 70
c/p behind your tube
Take your Magic Wand
Click inside Frame
Expand by 4
Take a paper of choice, I am using Paper 4
c/p behind frame
Selections-Inverts-Delete
Do Not DESELECT
Take EL 54 Sparkles
c/p onto paper
Selections-Delete
DESELECT
EL 37 Flower resize to 30
Image-Flip Vertical
c/p to thr bottom right of your frame
Go to Layers Palette
Right Click-Duplicate
Place copy on left side of frame
EL 69 Leaves resize to 40
c/p to bottom left of frame
Take EL 32 Eiffel Tower resize to 70
c/p to the left side in front of frame
Take EL 25 Book resize to 20
c/p and place in front of your tube
**Optional**
I wanted to make it look as if the tube fingers is touching the book.
If you want to do this just grab your eraser tool, round 5
make sure you are on the Book Layer, it also helps to make your image larger.
Now where your tube's finger is, you start erasing little by little downward
until her finger is in full view in front of book
EL 53 Postcards resize to 30
Go to 
Image-Free Rotate-right 10
c/p and place bottom right in front of  Frame
EL 46 Clock resize to 30
Go to 
Image-Free Rotate-Right 10
c/p to the left bottom
EL 68 Musical Note resize to 60
Go to Adjust-Sharpen
c/p right behind EL 46 Clock
EL 66 Bottle resize to 30
c/p  and place at bottom in front of tube
EL 24 Car resize to 40
Image-Horizontal Flip
c/p and place behind EL 53 Postcards
EL 17 Accordian resize 50
c/p and place  to the right bottom behind Car
EL 64 and 71 Flowers, I resized them to 20 
c/p and scatter them at the bottom
EL 57 resize to 50
Adjust-Sharpen
c/p and place at bottom left
If you are happy and simply love your tag, Merge Visible.
Add your mask of choice
Layers- New Raster Layer
Go to your Layers Palette and bring the new layer to bottom
Take your magic wand and click on new layer
Take your paper of choice I am using Paper 9
c/p to new layer
Take your mask of choice
Go to 
Layers-New Mask Layer
From Image
Take your mask of choice
Click OK
Merge Group-Selections None-Merge Visible
I blasted my tag with Radiance but as always this is optional :D
Add your Name, Copy write and License Info
Save as PNG!
post signature

Star of India - CT PTU Tutorial - Diwali Wishes - Karra's Kreative Korner

Star of India
Program of Choice
PSP X4 but any other version will work fine!
Scrapkit
A Stunningly Beautiful kit by Karra's Kreative Korner "Diwali Wishes"
Available for Purchase HERE and HERE
Tube of Choice
I am using the beautiful Viviaan by Zlata_m
HERE
Font of Choice
Prognostic
HERE
Mask of Choice
I am using one by Dee from her Floral Masks
HERE
Filters
Radiance
Porcelain
Abbreviations
C/P - copy and paste
EL - Element
Here We Go!
Remember to add your drop shadows as you go!
New Image 700 x 700
C/P your tube of choice onto your canvas
Take EL Frame 4, resize to 95
c/p behind your tube
Take yor magic wand, click inside your frame
Selections-Modify-Expand by 4
Take your choice of paper I am using Paper 8
c/p  behind frame
Selections-Inverts-Delete
DO NOT DESELECT!~
Take EL India Skyline
c/p  behind frame
place at the middle of frame
Selections-Inverts-Delete
DO NOT DESELECT!~
Take EL Sand
c/p inside frame, in front of skyline towards bottom
Selections-Delete
DO NOT DESELECT
Take EL Bead Curtain
c/p behind frame towards top
Selections-Delete
Selections-None
Now for the elements! This  kit has some beautiful elements I wish I can use them all!
EL Box and EL Candles - resize to your liking 
c/p at bottom right  behind tube
EL Pillows - re-size to 70
c/p and place behind tube
EL Wicker basket, resize to 20 
c/p on left side of your tube
EL Vase, resize to 20
c/p behind Wicker Basket
EL Sun - resize to 80 
c/p onto your background
EL Leaves 3 resize to 40 and you can scatter these as you would like on your tag or like I did
c/p on on each side of behind your elements
EL Flower 3 and Flower 1 resize to 10 and these also you can cp and scatter them as you want!
EL Dishes, resize to 10 
c/p to the bottom in front of your tube
EL Rice, resize to 30
c/p to the bottom
EL Hanging Deco resize to 50
c/p to left side of frame
Go to Layers Palette, right click Duplicate
Image-Horizontal and place on right side of frame
EL Cranes resize to 50 
c/p in front of tube
EL Bow 3 resize to 20
c/p at bottom in front of EL Dishes
I added some EL Sparkles 1 , resize to 80
c/p to background and also EL Palm Tree
resize to 70
c/p to background, resized that same elements smaller 
c/p to background also.
Merge Visible
Add your mask of choice
Layers- New Raster Layer
Go to your Layers Palette and bring the new layer to bottom
Take your magic wand and click on new layer
Take your paper of choice I am using Paper 14
Might have to resize a little larger
c/p to new layer
Take your mask of choice
Go to 
Layers-New Mask Layer
From Image
Take your mask of choice
Click OK
Merge Group-Selections None
I like  my masks to stand out so I duplicated the mask, Merged Down duplicated it, flip horizontal, but that is my choice. You can do it whichever way you like :D
I blasted it with some Porcelain and Radiance, but as always you can play around with these filters to get it where you want!
Dont forget to add your copywrite and license info and name!
Save as PNG
Thank you for trying my TUT!
post signature

July 13, 2014

"A Lil Goth" - CT PTU Tutorial - Mellie Beans

A Lil Goth


Materials
PSPX 4
Or any other version will work!

Scrapkit
Awesome kit "A Lil Goth" by Mellie Beans, This kit is jammed packed with wonderful elements and no duplicates, gives you more to play around with!
HERE

Tubes of Choice ( you will need a tube that has a Close-up)
A fabulous tube by Ismael Rac "Goth" and "GothicDoll"
HERE

Mask of Choice
HERE

Filters of Choice
Xero Porcelain

Font of Choice
Deutsch Gothic
HERE

Add your drop shadows as you go!


Here We Go!
Open New Image 700 x 700
You can crop once your are done!
I am using 2 tubes, but you can use one only if you would like...Just make sure you have a closeup of your tube choice
Take your tube of choice
re-size to 90, copy & paste onto your canvas
Take Frame 1, re-size to 80
copy & paste right behind your tube
Take your magic wand, click inside frame
Selections-Modify-Expand by 5
Take your closeup 
copy & paste behind your frame, position to your liking
Selections-Invert-Delete
**KEEP SELECTED**
Take your closeup again 
copy & paste, position to you liking
HIT DELETE again
Selections None
**make sure your closeup tube layers are behind your Frame 1**
Go to Layers Palette and Merge Down
your closeup layers
I took 2 colors from my tube to make a gradient
You can also use Texture, or use one of the papers from the kit
Make it your own!
Go back to your Frame, Magic Wand, click inside frame
Selections-Modify-Expand by 5
Layers-New Raster Layer
Floodfill with your choice
DESELECT
Again, make sure this later is behind Frame and tube layers!
Lets play around with those Filters/Blends!
Go to you Layers Palette, find your closeup tube layer
Right Click-Duplicate
Still on this later
Go to Adjust-Blur-Gaussian Blur-6.0
Layers Palette-Properties
Blend Mode Screen
On my original closeup tube layer
Properties
Blend-Mode Luminance
Opacity 46
You can always play around with your blends till you get it to where u want!
Now lets add those elements. This kit has so many beautiful ones I wish I can use them all!
Take Element 3, re-size to 30 copy & paste right in bottom of tube
Take Element 2 Re-size to 60
Adjust - Sharpen More
copy and paste right behind Frame only
Taking your Eraser Tool you can erase an excess of the Element 
Take Element 10 re-size to 50
copy & paste  and place right in the center bottom of frame behind tube
Take Element 37 re-size to 30
copy & paste, place at the bottom of your tag
Take Element 39 re-size to 30
copy & paste place at bottom of your tag
Take Element 42 Flower, resize it small and just place a few anywhere at the bottom of your tag
Tke Element 40 (ball and chain), re-size to 60 copy & paste to the bottom right of your tag
Go to layers palette duplicate that layer
still on your layers palette move the copy of that layer in front of tube
We want to make t look like the chain is going around her arm
Get your eraser tool and erase some of the chain on her arm
You can see my tag for reference
Take Element 21, re-size to 20
Image-Flop Vertical and place to the right bottom behind tube
Take Element 19, copy & paste on either side of your Frame
Layers Palette, Right Click Duplicate
and place the other later on other side of Frame
You can add more lements if you would like!
 when you are done
Go to your MAIN tube layer
Layers Palette-Right Click-Duclicate
On your copy tube layer
Adjust-Blue-Gaussian Blur 3.0
Back to Layers Palette-Right Click-Prioperties
Blend Mode Hardlight
But you can always play around to find the one that works for you!
Once you are happy with it, Merge Visible
Add your Mask of choice
Once finished a gave my tag a blast of Porclain!
Add your Name, License and Copywrite Info and save your tag as PNG!
Hoped you enjoyed my Tut!
I would love to see anything you make with it
Latinangel1964@aol.com
post signature

July 12, 2014

"Blue Butterfly" - CT PTU Tutorial - Kissing Kate


Blue Butterfly

Materials

PSP X4
Any other version will work
 Scrapkit

A lovely scrapkit by Kissing Kate named Blue Butterfly
HERE

Tube
I am using the lovely work of  Susan McKirvergan
You need a license to use her work
She was formerly at Up Your Art

Filters
Xero Bad Dream, Porcelain

Mask
I am using one by Vix
HERE
Font
Mirella
Remember to add your drop shadows!
Here We Go!
Open New Image 700 x 700
Take your tube, I am using the close-up but you can chose, re-size  to 80
copy & paste onto your canvas
Take Frame 2 , re-size to 80
copy & paste behind your tube
Take your Magic Wand, click inside Frame 1, 
Selections-Modify-Expand 6
Take Element 44, make bigger if needed
copy & paste behind your frame
Selections-Invert-Delete-Selections None
Take Frame 1 , Resize to 80 
copy & paste behind Frame Frame 2
Take Element 43. re-size to 50
copy & paste to the left side of Frame 1
Take Element 5 re-size to 90
copy & paste to right side of Frame1
Go to Layers Pallet
Right click-Duplicate on Element 5
Image-Flip Horizontal,
copy & paste and place on other side of  behind frames
Take Element 23, re-size to 60
copy & paste, place the right side behind frame1 in your background
Go to Layers Pallet
Right click-Duplicate on Element 23
Image-Flip Horizontal,
copy & paste and place on other side of  behind frame 1
Take Element 3, re-size to 30
copy & paste and place on right side of Frame
Now I wanted to make some sort of Ground so I took Element 40, re-sized it and duplicated this layer 2 times so I will have now 3 layers. I placed them right underneath my tube. You can place as you like. Once you are happy with it Go to you layers pallet, and Merge down these 3 layers and add a drop shadow
Take Element 44 re-size to 30
Image - Free Rotate-Left 25 
place at bottom, I duplicated this layer and placed another one up above tube
Take Element 41, re-size by 30, I gave it a little Radiance to make it darker and I placed at bottom left side by fountain
Take Element 36, re-size to 20 and scatter them around as you would like
Take Element 4, resize to 50
Image - Rotate Right 
copy & paste to right in front of your tube
Take Element 13, re-size to 30
copy & paste and place anywhere on your tag
You can place a few of these around your tag if u wish
Take Element 38, re-size to 30
copy & paste and place on the bottom of your tag
Element 14, re-size to 40
Adjust-Sharpen
copy & paste, place on the bottom to your right
Once you are happy with your creation 
Go to your main tube
Layers Palette-Right CLick-Duplicate
On your copy of tube, 
Adjust-Blur-Guassian Blur 3.0
Now go to
 Effects-Xero-Bad Dream
Settings:
70-131-Blue
Go back to layers palette
Properties-Blend Mode-Soft Light
Lower Opacity to 61 or whatever you like
Add you mask if you are using one
Merge Visible
I blasted my tag with some Porcelain
Crop to you liking
**Add your Name, Copywrite and License Info**
Save your creation as PNG
Thank you for trying my tut!
post signature

Punk Prom Princess- PTU Tut - - Pink Paradox


Materials

PSP X4 
Or any other version will do

Scrapkit
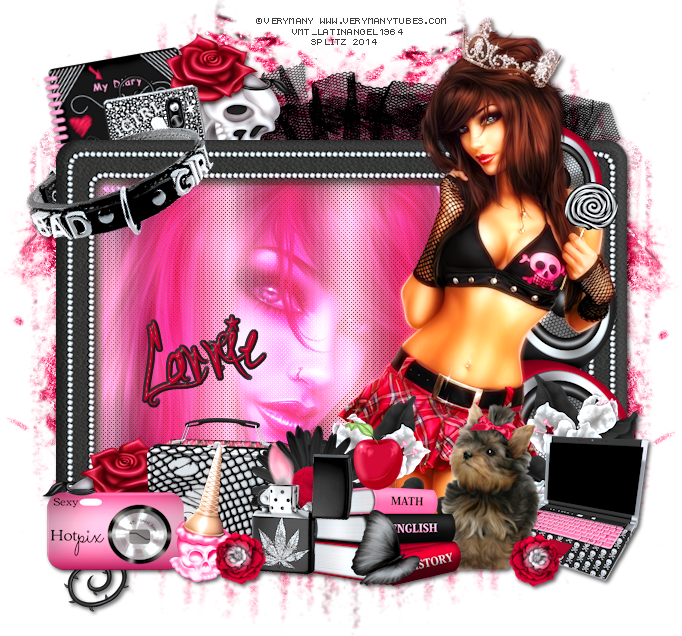
Punk Prom Princess by Pink Paradox
Gorgeous kit, filled with so many beautiful elements and papers!

Gorgeous work of Verymany

Mask

Texture I used is from Vix

Font
FTU Sick Vice Capital

Filters
Xero Radiance, Soft Vignette, Bad Dream

Here we Go!!
Open New Image 700 x 700
You can resize later
**Add your drop shadows!**
Take your tube and place on the right hand side of you canvas.
Will work work with this later on
Take Element 19 Frame, re-size and place in the middle of your canvas
Take your magic wand, click inside frame
Selections-Modify-Expand by 5
I am using Texture 12 by Vix
I adjusted the color to the texture by going to 
Adjust - Hue Saturation 
with these settings
Hue 223 Saturation 153
now copy & paste onto your frame
Selections-Invert-Delete
*KEEP SELECTED*
Take your close-up of the tube
Copy and paste behind your frame  
Selections-Invert-Delete-Selections None
On your layers palette
Right click - Duplicate 
On your close-up tube
On the copy
Adjust-Blur-Gaussian Blur 6.0
Back to my Layers Palette
Still working on the tube copy layer
Right Click
Properties-Blend Mode Screen
Click on Original tube layer
Right Click
Properties-Blend Mode Luminance - Opacity 83
Back to my Copy tube layer
Go to
Effects-Xero-Soft Vignette
Settings
Horizontal (Sharp), Foreground Color - Diagonal Mesh
Play around with the settings till you get it to where you like :D
then click ok
**Optional -  I went back to Xero- Soft Vignette and this time changed it to Background Color, played around with the settings then clicked ok**
Now for the elements. This kit is jammed packed with lovely elements so you can go crazy with it.
I love using alot of elements to show off the kit so I used the following:
Re-sizing as you like
Elements
2
7
11
16
19
33
34
35
38
40
41
45
70
87
89
136
140
169
I took Element 87  the speakers, re-size to 50, copy and paste behind your main tube layer.
Take Element 16 the bracelet , Re-size to 35 or smaller if you like
Go to 
Image-Free Rotate-Left 25
Copy and Paste on the left hand top corner of your frame
Layers Palette
Right Click-Duplicate and move the copy behind the frame
Go back to your Original Bracelet Layer
You want to make it look as if the bracelet is hanging from the frame
Take your Eraser Tool- Round 10
I erase as much as possible to give it the look that I want
Take Element 169 Net
Resize, copy and paste right behind frame
Take Element 89 My Diary re-size to 20
Image - Free Rotate Left 10
Copy and paste, left hand corner behind Frame
Take Element 34 iGirl re-size to 20
Image - Free Rotate-Left 10
I also sharpened this element
Copy and Paste left hand corner behind Frame
Take Element 11 Skulls
Re-size to 20
and copy and paste right behind the Igirl element
Take element 40 Lollipop
resize to to 15
Sharpen a little
Image-Flip Horizontal
place on our tubes hand
Again take your Eraser tool and erase enough to make it look like she is holding it
All your other elements you can place in the bottom as you want to make the tag totally your own :D
Lets make the Tube POP!
Layers Palette Highlight your main tube layer
Right Click - Duplicate
Working with your Main tube COPY
Go to
Effects-Xero-Bad Dream
Settings I used 209 and 82
But as always Play around with them!
Click ok
Back to Layers Palette
Right Click Properties-Blend Mode Screen
I lowered the Opacity to 77
Once you are happy with how your tag looks
Merge Visible
Add your Mask, if you are using one
Go To Layers - New Raster Layer
On your layers palette bring that layer to the bottom
Magic Wand click in background
Copy and Paste your paper of choice,  I used Paper 13, to your back ground
Go to Layers - New Mask - From Image and chose your mask
Merge Group then Merge Visible 
You can use your drop tool to crop off any excess and you are done!
**Add your Name, Copywrite, and License Info**
I blasted my tag with some Procelain
Settings
124-64-0149-67-158-225
As always you can play around with the settings to make it your own or use a different filter!
Thank for trying my tut! Would lobve to see anything you make. 
My email is Latinangel1964@aol.com
post signature

July 10, 2014

Calming Beauty - CT PTU Tutorial - Mellie Beans


Calming Beauty
Materials

Program
PSP X4
Any any other version will work 
Scrapkit
A Beautiful new kit by Mellie Beans named "The Art of Calm"
HERE
Tube
Keith Garvey
HERE

Font
FTU Zebra
HERE
Filters
Zero Radiance
Penta Color Dot
Mask
Moonbeams & Spiderwebs
HERE
Here We Go!
Open New Image 700 x 700
Resize your tube to 70 , copy  & paste onto your canvas
Take Frame 1, resize to your liking
copy & paste behind your tube
Take your magic wand, click in inside your frame
Selections-Modify-Expand by 5
I took my closeup of the tube, copy & paste behind the frame
Selections-Invert-Delete-Selections None
Still on your close-up, go to layers palette, right click duplicate
On your COPY tube layer 
Adjust-Blue-Gaussian Blur 6.0
Blend Mode: Hard light
on your original tube layer
Luminance - Opacity down to 46
Now take your color picker and choose 2 colors from your tube or kit to make a gradient.
Take your Magic Wand  and click inside your frame.
Selections-Modify-Expand by 5
Make a new raster layer and flood fill with your gradient
**Make sure your gradient layer is behind your frame**
Go to Effects - Penta Color Dot with these Settings
234-17-255-255-255
Now lets start filling your tag!
Take Element 1, resize to your liking and place on bottom left of frame
Layers Palette-Duplicate-Flip Horizontal
place on other side of frame, behind tube
Take Element 11 resize to your liking and place underneath tube so it looks like she is sitting on it
Take Element 22 resize to your liking , Copy & paste and place in front of Element 1 left.
Take Element 24, resize Copy & paste and place behind to to the right in front of rocks
Take Element 21 Copy & paste and place behind tube and do the same for Element 4
Take Element 8, resize Copy & paste and place right in front of towels
Take Element 2 resize copy & paste and place right behind tube bottom
Take Element 2 resize copy & paste in different parts of your tag
Take Element 3 resize copy & paste in the background in the right like in my tag.
Take Element 4 resize copy & paste and place it anywhere on your tag that you would like!
Take Element 32 resize copy & paste and place to the left, in front of your frame or anywhere you would like!
Now lets make that tube POP!
Take your MAIN tube
Layers Palette- Right Click- Duplicate
Still on your COPY tube layer
Adjust - Blur - Gaussian Blue 3.0
Go back to Layers Palette
Effects - Radiance with these settings:
194-121-219-255
**REMEMBER you can always play around with the settings until you find what works for you! **
Layers Palette - Properties - Overlay
Opacity 55
Slight drop shadow!
Now once your happy with your creation Merge Visible.
Now lets  blast your tag with a filter..I chose Radiance with these setting but as always you can play around with it!
So go to Effects - Radiance 
109-182-149-85
Re-size to your liking
Add your Name, Copywrite and License info and save your tag as PNG!
Thank you for trying my tut! I would love to see anything you do. My email is latinangel1964@aol.com

post signature

July 9, 2014

Midnight Fairytale - CT PTU Tutorial - Heather's Devine Dezigns

Materials


Program
PSP X4 or any other version will work

A Fabulous PTU Scrap kit by Heather's Devine Dezigns 
HERE

The gorgeous art by Renee Biertempfel
You need a license to use her work and you can get that HERE

Mask
Your choice, I used a floral one by Dee
HERE

Font
FTU FairyDust 
HERE

Here We Go!
Open New Image 700 x 700
(You can resize later)

Take your tube, copy & and paste onto your canvas
 We will work with this in a bit.
Take Element 99 Frame, copy & paste and  place in the center of your canvas behind your tube. I added a little Radiance to the frame to make it darker, it is up to you :D
Take your magic wand click inside Frame
Selections-Modify-Expand by 5
Take Paper 4 
Copy and Paste onto your frame, position to your liking
Selections-Invert-Hit Delete
Take Element 5 Leaves
Copy & Paste, position at the bottom of frame
Take Element 74 copy and paste and place behind your frame
Take Element 17, Go to Image-Rotate Left-Free Rotate 25.0 and you will place them in the background to the left, Layers Palette, right click Duplicate and place on other side. NOW take same element and
 resize to 50
Copy & Paste to one side in front of your frame. On your Layers palette, right click Duplicate
Image-Flip Horizontal and place it on the other side of frame
Take Element 80 Mushrooms resize to 40 and place at the bottom of your frame position to your liking.
Take Element 40 resize to 80, Copy & Paste right in the bottom middle of the frame
Take Element 24, Resize to 40, Copy & Paste and place in front of the mushroom
Take Element 4 Resize to 30 
Copy & Paste and place right next to the books
Take Element 22 Wall and copy and past inside the frame and place it low to the left. Using your Eraser tool, erase any excess that is overlapping the frame.
 Take Element 12 House, Resize to 60 Copy & Paste and place right behind Wall.
Take Element 6 Resize to 30 and place on the right side bottom.
Lets go to your tube. We want to make it look like her knee is resting on the wall. So lets position your tube that way (See my tag for reference) then 
 we are going to Layers Palette, find your tube layer
Right click Duplicate. Move the tube copy behind frame.
If your happy with it you will take your eraser tool and go to your original tube layer and eras any excess tube that is showing outside the frame. Add a slight drop shadow.
Take Element 78, reside to 40 copy and paste at the bottom of the frame.
I wanted to add Element 24 the overflowing fountain also, I think it is so pretty!
Once you are happy with your beautiful creation you can Merge your tag!
Lets add our Mask
Layers, New Layer
Go to layer palette bring that new layer to the bottom. Take your Magic Wand, click on your background. I chose Paper 8 so lets copy & paste that.
Go Layers - New Mask - From Image and choose your mask choice. Layers-Merge Group.
I blasted my Merged tag with Porclain but as always you can play around with the filters and I also added a slight drop shadow!~

You are Done!

**Do not forget to add your Name, Copywrite, and License information**
Save your tag as PNG!

Thank you for trying my tut!. I would love to see anything you make!
post signature

July 7, 2014

Tutorial - Bitten

This Tutorial is my own creation!
You must have a basic knowledge of PSP
MATERIALS
I used a Fabulous Scrapkit named  "Bitten" by Whisprd Designz
HERE
You will need a tube with a close-up. I chose a beautiful one  from Barbara Jensen. You need a license to use her work. Go HERE
Font
FTU Midnight Hour
HERE
Filters
Vanderlee Unplugged Interlace
Radiance
Remember to add your Drops Shadows to your elements!
Here We Go!
Open new image 650 x 650
Take Element Frame 3 resize to your liking.
Take your magic wand, click inside of Frame 3 
Selections - Modify - Expand by 6
Copy & Paste Paper 18
Go to Selections-Invert-Delete-Deselect
Let's take that magic wand again, click on inside of Frame 6. 
Selections-Modify-Expand 6
Take the close-up of the tube and position it inside of Frame to the left , you can see my tag for reference
Selections - Invert - Delete
**KEEP SELECTED**
Taking your close-up again, copy & paste to inside of frame and position it to your liking.  NOW hit Delete. 
Deselect 
On your Layers Palette make sure to move your frame over the tubes, Merge down tube layers, right click duplicate
On your COPY tube layer
Go to Adjust - Blur - Gaussian 3.0
Go back to Layers Palette, right click Properties
I used Overlay
On your Original tube layer right click Properties and use Screen and lower the Opacity to 65 or whatever you like. Remember  you can always play around with the blends to make it your own.
Go to Effects - Vanderlee Unplugged - Interlace - OK
Take your main tube, resize to 80,  place copy  & paste on your canvas, position to your liking
Take Element 49 and make it large  enough so you can put behind your frame
Take element 7 resize to 40 and place on one side of frame. Go to Layers Palette, right click Duplicate
Image - Flip Horizontal
Place it on the other side of frame.
Take Element 2 - Resize to 20 and place next to skulls.
Take element 3 Resize to 40. You can duplicate and resize the flowers a few times and place them as you want on your tag.
Take element 1- Resize to 40 and place right behind the roses in front of the tube.
Take element 19 - Resize to 20 - Image Free Rotate - Right 10
and position right behind the skulls to the right
Take Element 45. Copy and Paste and position behind the frames like in my tag - Layers Palette - Duplicate -Image-Flip Horizontal and position it to the other side of frames
Take Element 33 - Resize to 40, copy and paste. Position it right behind first frame. Layers Palette - Right Click - Duplicate. Place it on other side behind frames.
Go back to your MAIN tube. On your Layers Palette - Right Click - Duplicate.
On your first Main tube layers - Right Click - Properties-Soft Light - Opacity 65 or whatever you like.
I did not use a mask but I took Element 35 (glitter) Resized to 90 and placed in the background.
**Optional**
I blasted my tag with a little Radiance with these settings
94-152-109-143
Again, you can play around with the settings till you find what works for you!
**Add your Name, Copywrite and License info**
Merge you tag once you are happy with it!
Hope you enjoyed my Tut!
I would love to see your results
Please email me your results @ latinangel1964@aol.com and I will post your tags on my blog!
post signature

July 6, 2014

"Roadtrip" - CT PTU Tutorial - On the Road Again Scrap Kit by Jackie's Jewels


This tutorial is of my own creation
You must have a basic knowledge of PSP
ROADTRIP

Materials
Scrap kit On The Road Again by Jackie's Jewels. You can visit her HERE
Artist - Keith Garvey and you must have a license to use his work!
HERE
Mask by Rachel
HERE
Font used 
Zebra
PSP X4 or any version will work fine
Filters
Radiance
Its a long Tut but your end result will be FABULOUS!!
*NOTE*
A trick I learned is to MERGE DOWN to eliminate too many layers
Open New Image 650 x 650
 Take Frame 1 resize to 70, free rotate 10 left copy and paste to one side of image, rename frame 1. Duplicate frame, flip horizontal and place to other side of image, rename frame 2
(It's ok if both frames overlap a little)
Take you magic wand and click inside Frame 1, Make sure you also click the bottom part of the frame also!
Selections-Modify-Expand by 6
Take Paper 2 - Resize to 50
Copy and paste to the frame, position to your liking
Go to Selections-Invert-Delete, Deslect
Go to you layers palette and move frame up over paper
Now do the same with Frame 2, same steps but this time use Paper 3
Go to you layers palette, and merge down your layers
Take element NYCSkyline and resize by 90
Place a little above frames 
*Don't worry that the Skyline is overlapping the frames, you will fix this later on*
Take your Road1 element, resize by 70
place right a little above Skyline
It should look something like this'
Take element OldBike resize to to 70, copy and paste to Road1, add a drop shadow
Now take element Sign1, resize to 70
copy and paste to the left side of the Road1
Take element Gaspump, resize to 70 copy and paste to the right of Road1
Take element Cactus2 resize to 60 copy and paste right behind Gaspump
Take element Roses resize to 20 copy and paste, move to bottom of Gaspump, on your layers palette duplicate roses, flip horizontal and place over Sign1
Take Map2  resize to 20, Image-Free Rotate 10 - Sharpen and copy and paste on Roses
At this point, lets fix the Skyline. Take your Eraser tool and rease any excess Skyline
Take your tube of choice. I used Patch by Garv and resized to 80
copy and paste. Make sure she is on Road1 add a slight drop shadow.
Take element Suitcase, resize to 38 place in front of your tube, add a drop shadow
Take element Sunglasses resize to 35, copy and paste on top of suitcase.
take element Camera, resize to 25 copy and paste behind your tube to the bottom right.
Take envelope1 resize to 30, copy and paste to bottom right over Roses
Take element Map2 resize to 75, copy and paste behind your Frames, but that the top edges are showing.
take element Staple, resize slightly maybe to 95, copy and paste to top of right frame, go to layers palette, duplicate staple, flip horizontal, place on left frame.
Take element Keys, resize to 25, sharpen, copy and paste, place right underneath Staple on right frame
Take element Envelope, resize to 25 copy and paste, place by right bottom over Roses.
Take Motesign, resize to 40 copy and paste right behind your tube.
Take element Eagle resize to 30 copy and paste and place by Motel Sign. Take element Sun, resize to 60, copy and paste and place behind your frames by Motel sign. take element Clouds, resize by 60 and copy and paste and place behind other side of Motel sign.
Now for my favorite part!. Playing with blends and effects!
We want to make the tube "POP OUT" of the tag and there are so many ways you can do this!
So lets duplicate the tube by going to the Layers Palette-Right Click-Duplicate, ADJUST - Gausian Blur 3.0. 
Go to your layers palette, Right Click PROPERTIES
You can play around with these blends until you find the one you like the most! I chose the following:
Blend Mode - Hard Light
Opacity - 65
See the difference in your tube!
To add a mask to your tag, chose your mask, I chose one from Rachel
Go to Layer - New Raster Layer
On your layers palette bring that later to the bottom
Take your magic wand and click on blank layer
Take your paper of choice, I chose Paper 11, copy and paste onto canvas
Go to Layers - New Mask Layer - From Image
On the drop down screen choose your mask - Merge Group, Deselect
Place your mask as you want behind your tag. Again be creative, you can duplicate your mask to make it darker or you can flip vertical also. 
And Last.....I love to blast my tag with either Radiance or Porcelain. This is entirely up to you though but I love playing around with filters. It really makes your tags POP! 
So, lets merge everything.
I am using Radiance so go to Effects - Xero - Radiance
and I used these settings
76-70-109-67
Hit OK. 
and Wala!
 ADD YOUR NAME, YOUR COPYWRITE AND LICENSE INFO!
Save your creation as a PNG!
Hope you enjoyed this tut and you learned some new tricks!
post signature

July 2, 2014

CT Tags, Cluster Frame and Extras - Heather's Devine Designs

CT Tags and cluster frame using and fabby and fun kit "Tiki Beach Party " by Heather's Devine Designs!
Visit Heather here to scope out where she sells at and see her other goodies!  CT Tags done using the awesome work of Alex Prihodko and Robert Freeman

Cluster Frame
(just right click and save)


Tag made using cluster


EXTRAS!