"Roadtrip" - CT PTU Tutorial - On the Road Again Scrap Kit by Jackie's Jewels
This tutorial is of my own creation
You must have a basic knowledge of PSP
ROADTRIP
Materials
Scrap kit On The Road Again by Jackie's Jewels. You can visit her HERE
Artist - Keith Garvey and you must have a license to use his work!
HERE
Mask by Rachel
HERE
Font used
Zebra
PSP X4 or any version will work fine
Filters
Radiance
Its a long Tut but your end result will be FABULOUS!!
*NOTE*
A trick I learned is to MERGE DOWN to eliminate too many layers
Open New Image 650 x 650
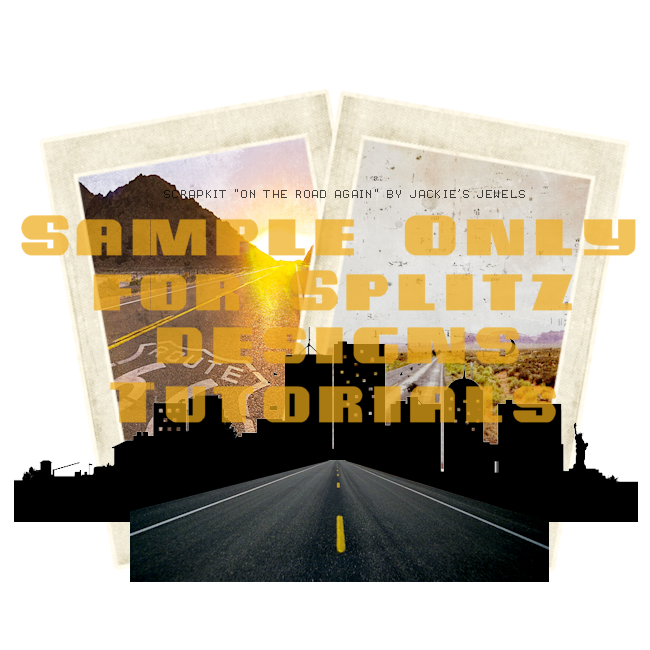
Take Frame 1 resize to 70, free rotate 10 left copy and paste to one side of image, rename frame 1. Duplicate frame, flip horizontal and place to other side of image, rename frame 2
(It's ok if both frames overlap a little)
Take you magic wand and click inside Frame 1, Make sure you also click the bottom part of the frame also!
Selections-Modify-Expand by 6
Take Paper 2 - Resize to 50
Copy and paste to the frame, position to your liking
Go to Selections-Invert-Delete, Deslect
Go to you layers palette and move frame up over paper
Now do the same with Frame 2, same steps but this time use Paper 3
Go to you layers palette, and merge down your layers
Take element NYCSkyline and resize by 90
Place a little above frames
*Don't worry that the Skyline is overlapping the frames, you will fix this later on*
Take your Road1 element, resize by 70
place right a little above Skyline
It should look something like this'
Take element OldBike resize to to 70, copy and paste to Road1, add a drop shadow
Now take element Sign1, resize to 70
copy and paste to the left side of the Road1
Take element Gaspump, resize to 70 copy and paste to the right of Road1
Take element Cactus2 resize to 60 copy and paste right behind Gaspump
Take element Roses resize to 20 copy and paste, move to bottom of Gaspump, on your layers palette duplicate roses, flip horizontal and place over Sign1
Take Map2 resize to 20, Image-Free Rotate 10 - Sharpen and copy and paste on Roses
At this point, lets fix the Skyline. Take your Eraser tool and rease any excess Skyline
Take your tube of choice. I used Patch by Garv and resized to 80
copy and paste. Make sure she is on Road1 add a slight drop shadow.
Take element Suitcase, resize to 38 place in front of your tube, add a drop shadow
Take element Sunglasses resize to 35, copy and paste on top of suitcase.
take element Camera, resize to 25 copy and paste behind your tube to the bottom right.
Take envelope1 resize to 30, copy and paste to bottom right over Roses
Take element Map2 resize to 75, copy and paste behind your Frames, but that the top edges are showing.
take element Staple, resize slightly maybe to 95, copy and paste to top of right frame, go to layers palette, duplicate staple, flip horizontal, place on left frame.
Take element Keys, resize to 25, sharpen, copy and paste, place right underneath Staple on right frame
Take element Envelope, resize to 25 copy and paste, place by right bottom over Roses.
Take Motesign, resize to 40 copy and paste right behind your tube.
Take element Eagle resize to 30 copy and paste and place by Motel Sign. Take element Sun, resize to 60, copy and paste and place behind your frames by Motel sign. take element Clouds, resize by 60 and copy and paste and place behind other side of Motel sign.
Now for my favorite part!. Playing with blends and effects!
We want to make the tube "POP OUT" of the tag and there are so many ways you can do this!
So lets duplicate the tube by going to the Layers Palette-Right Click-Duplicate, ADJUST - Gausian Blur 3.0.
Go to your layers palette, Right Click PROPERTIES
You can play around with these blends until you find the one you like the most! I chose the following:
Blend Mode - Hard Light
Opacity - 65
See the difference in your tube!
To add a mask to your tag, chose your mask, I chose one from Rachel
Go to Layer - New Raster Layer
On your layers palette bring that later to the bottom
Take your magic wand and click on blank layer
Take your paper of choice, I chose Paper 11, copy and paste onto canvas
Go to Layers - New Mask Layer - From Image
On the drop down screen choose your mask - Merge Group, Deselect
Place your mask as you want behind your tag. Again be creative, you can duplicate your mask to make it darker or you can flip vertical also.
And Last.....I love to blast my tag with either Radiance or Porcelain. This is entirely up to you though but I love playing around with filters. It really makes your tags POP!
So, lets merge everything.
I am using Radiance so go to Effects - Xero - Radiance
and I used these settings
76-70-109-67
Hit OK.
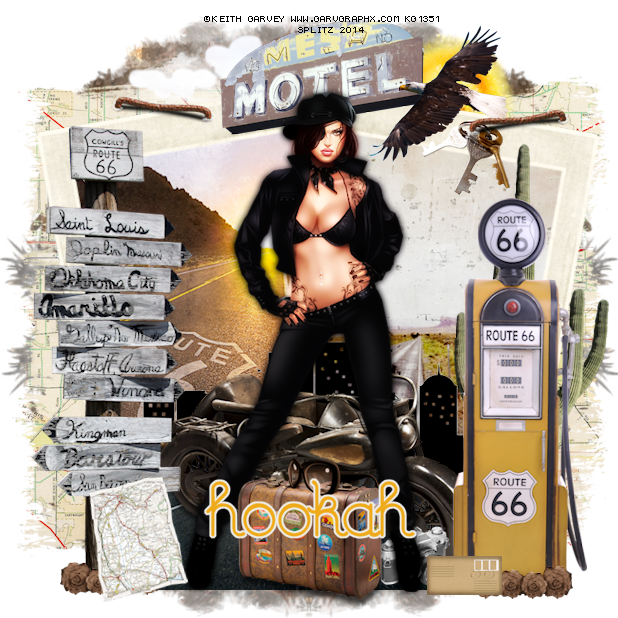
and Wala!
ADD YOUR NAME, YOUR COPYWRITE AND LICENSE INFO!
Save your creation as a PNG!
Hope you enjoyed this tut and you learned some new tricks!

No comments:
Post a Comment