Beautiful FTU Scrapkit by Candy Treats named Moonlight
I am using the gorgeous work of Jessica Dougherty
You need a license to use her art and you can get both
and also check out the fabulous goodies !
Mask is the second one.
FTU Font Beaked Tyrant Personal Use
HERE
No Outside Filters Used
HERE WE GO!
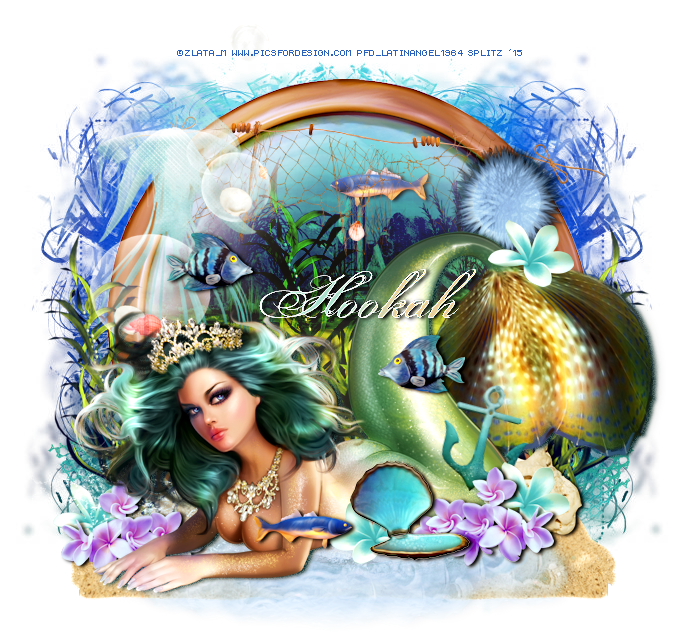
Open new image 700 x 700 If animating Flood Fill White, c/p tube of choice onto your canvas.
On your tube layer go to
Effects - Photo Effects - Black and White Film
Settings:
Brightness -33, Clarify 45
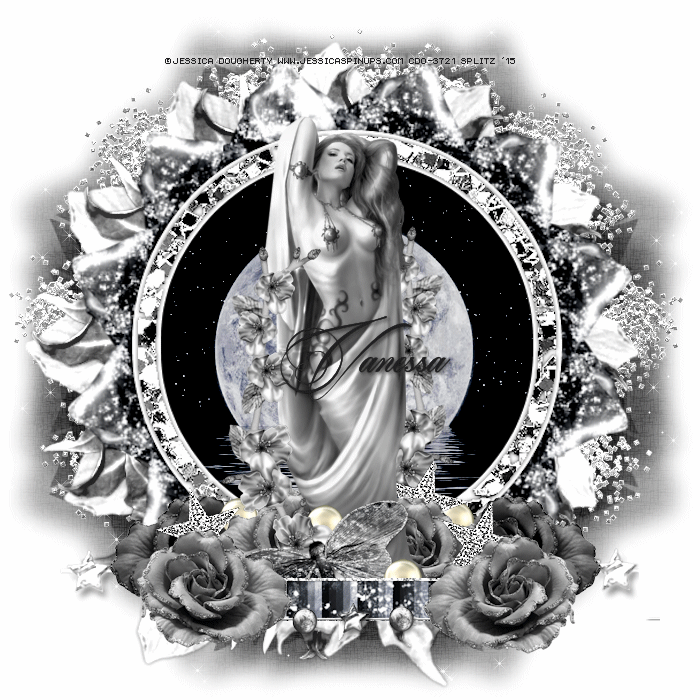
Choose from kit Leaf Frame resize larger to 115, c/p and place behind tube, Take Frame 2 resize larger to 115 c/p and place in front of Leaf Frame. Magic Wand Click inside Frame 2, expand by 6 take Paper Moonlight, resize to 60 c/p and place behind Frame 2, center the paper so the Moon is right behind tube, selections invert delete deselect. Duplicate paper, on Copy go to Properties - Burn. Last El Glitter Spill, c/p and place behind Leaf Frame to the far left, duplicate flip horizontal and place to the far right. Now Merge Down Leaf Frame and the Glitter Spill layers and rename Leaf Frame
El Rose resize to 30, c/p and place to the RIGHT side of tube layer, duplicate, duplicate Rose layer, flip horizontal and now place to the bottom RIGHT behind tube layer. Repeat same steps as above for Rose layer and place according to the LEFT side of tube. Star 3 resize to 20, Free Rotate 15 Right. Effects, Enhance Edges.
c/p and place to the far RIGHT behind Rose layer. duplicate Star layer, Flip horizontal and place behind Rose layer to the LEFT. Duplicate star layer one more time and place behind Rose layer behind tube. EL Star String resize to 70 c/p and place between the 2 ROSE layers in front of tube. El 5 Ribbon, repeat same steps as for Star String c/p nad place behind Star String. Merge Down these 2 layers. . Take Eraser tool and erase anything showing out of the Rose Layers. El Butterfly resize to 30 c/p and place in front of Tube behind Ribbon layer. EL Dark Branch, resize to 60, Rotate Left, Flip Horizontal, c/p and place the left by tube, Duplicate layer flip horizontal and place to the right behind tube. El Pearl resize to 30, I duplicated this layer 3 times and scattered them at the bottom
El Rose 2 resize to 30, c/p and place to the far bottom left, duplicate this layer flip horizontal and place to the Far Right.
Add your Mask, I am using Moonlight Paper 2 from the Freebie folder. Duplicate Mask. If your happy with your tag great. Add your name, opy Write and license info.
Save as PNG
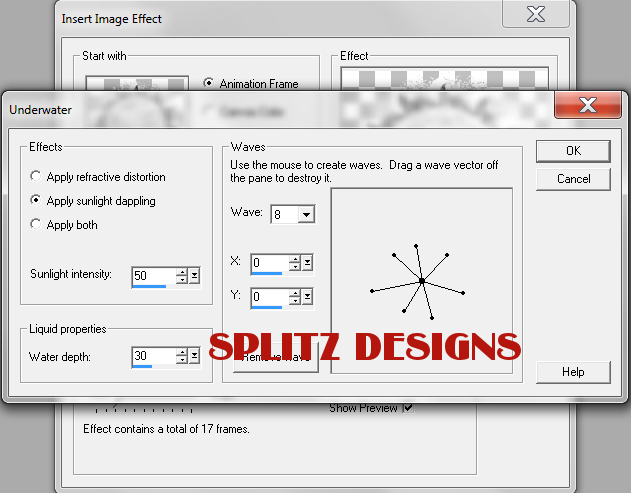
To Animate
Take Leaf Frame Layer and import that to Animation Shop
Go to
Insert Image Effects
Underwater
with these Settings:
You can always play around with the settings!
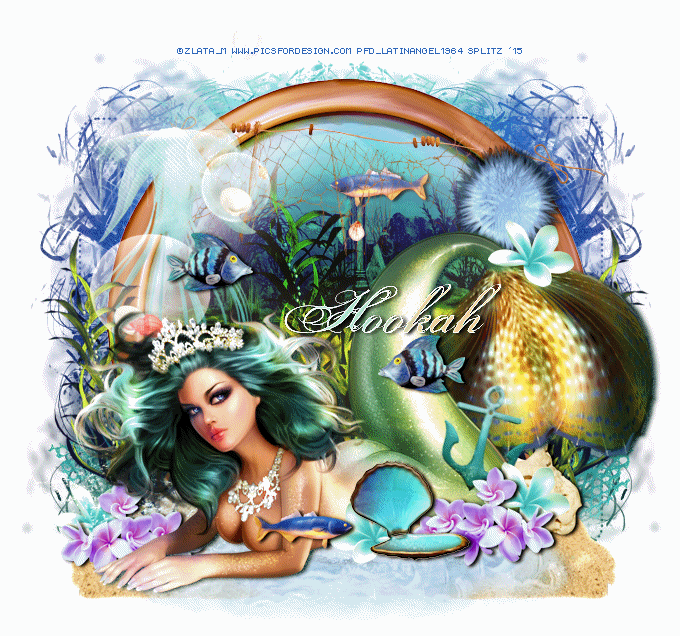
If you happy great, Back to PSP - close off Mask and Leaf Frame Layer, Merge Visible elements
Copy Tag import to AS as new animation
My animations has 17frames so SELECT ALL on your animation, I will make 17 frames of the tag. Go to EDIT, Duplicate until you have the 17 frames. Select All, C/p onto into Selected Frame (Animation)
**MAKE SURE BEFORE YOU PAST THAT ALL YOUR FRAMES ARE SELECTED AND YOU ARE PASTING ON FIRST FRAME**
Back to PSP. Close off Tag open up mask layer, copy import to Animation shop, make 17 Frames. Go bac to animated tag, select all, c/p and place on Mask frame. and you are done.
Save as Gif